
Unveiling the Art of Ash Glazing
Discover the fascinating process of creating food-safe ash glazes for your pottery. In this guide, we will take you step-by-step through the essentials, empowering you to achieve stunning and safe results that will elevate your ceramic creations to new heights!
Gather Your Essentials
To create your food-safe ash glaze, you’ll need:
Ensure you have these ready for a smooth glazing process!
Unlock the Secrets of Crafting Stunning Ash Glaze for Pottery
Choosing the Right Ash
Did you know not all ashes are equal?Start by selecting your ash source wisely. The two most common types for glazes are wood ash and plant ash, each bringing unique properties to your work.
Wood Ash: This is derived from the burning of hardwoods like oak, maple, or cherry. Wood ash is rich in calcium, potassium, and magnesium, making it an excellent base for creating glazes with a glossy finish. For instance, ash from birch trees can produce lovely pale colors and interesting textures.
Plant Ash: Consider using ash from other plants, such as banana peels or seawood, which can provide different mineral compositions. Banana ash, for example, can impart vibrant yellow hues to your glaze.
Check for Non-Toxicity: Ensure your ash comes from organic materials. Avoid ashes from treated woods or materials that may contain harmful substances.
Experiment with different types to discover their unique characteristics in glazing. Gather small samples first; a personal test pot will reveal how they perform and what shades they produce in your final kiln-fired piece.
Preparing Your Ash
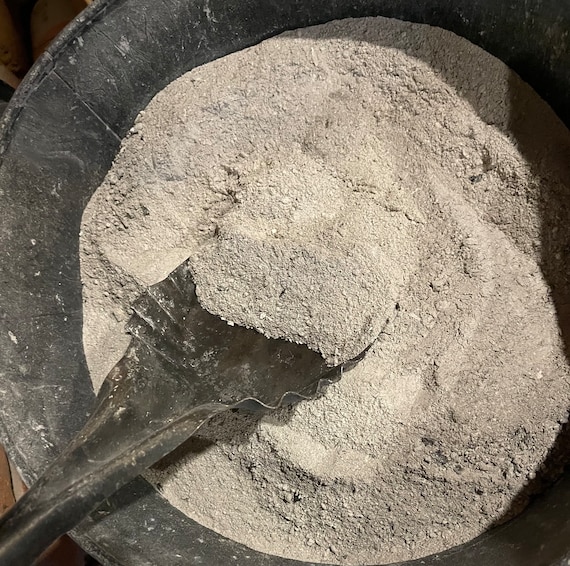
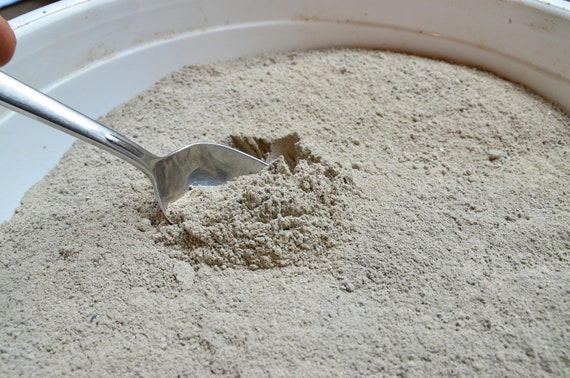
Transforming raw ash into glaze magic!Once you’ve chosen your ash, clean it to remove any contaminants. Start by collecting your ash and putting it in a large, dry container. If the ash contains large chunks or unburned materials, sift it through a screen or mesh to separate the finer particles needed for your glaze. Aim for a consistent texture, roughly the size of flour.
Next, wash your ash to eliminate any residual chemicals or impurities. Place the sieved ash into a bucket of water and stir it vigorously. Allow the larger particles to settle, then carefully pour off the water, leaving clean ash behind. Repeat this process if necessary for the best results.
After washing, dry your ash thoroughly in the sun or a low oven. It should be completely dry before moving forward; moisture can impact the glaze’s performance.
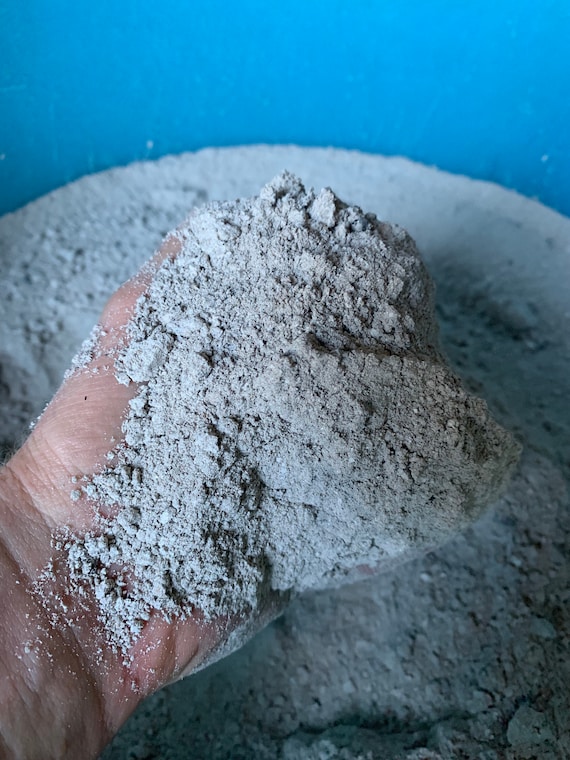
Lastly, if you plan to use wood ash, grind it into a fine powder with a mortar and pestle or a coffee grinder. This will enhance the glaze’s uniformity and help achieve the desired results in your pottery.
Mixing Your Glaze
The secret potion for stunning pottery!Now that your ash is prepared, mix it into a glaze. This step is crucial, as the right proportions will ensure a smooth and workable mixture. Start by gathering your ingredients: the prepared ash, clay, water, and optional ingredients like feldspar or silica for additional properties.
Calculate Your Ratios: A common starting point is to use a ratio of 30% ash to 70% other materials (like clay and silica). For example, if you decide to create 1,000 grams of glaze, mix 300 grams of ash with 700 grams of your other components.
Combine Ingredients: In a large mixing bowl, add the ash and the dry materials first. Stir these together thoroughly using a whisk or spatula to prevent clumping. Once evenly mixed, gradually add water, about 10% of the total mixture weight, and mix until you reach a smooth, creamy consistency.
Refine Texture: If the mixture feels too thick, add more water little by little until it flows easily. If it’s too thin, incorporate more dry ingredients gradually. Always remember to take notes on your mixture for future reference!
Prepare to test your glaze by ensuring it’s well-combined and homogeneous before application.
Testing Your Glaze
Why your first batch might not be your best!Before you glaze your main pieces, conduct test firings to evaluate your glaze for food safety and aesthetic appeal. This step is crucial for ensuring that your creations are safe and visually pleasing.
Create Test Tiles: Begin by preparing several small clay tiles or test pots. Apply your mixed ash glaze in varied thicknesses to observe how it performs during firing. For example, a thicker application might yield a different color or texture than a thinner one.
Fire Your Test Pieces: Place your test items in the kiln and fire them according to your usual firing schedule. Note the specific temperature and atmosphere (oxidation or reduction) as these can significantly affect the final outcome.
Assess the Results: Once cooled, evaluate the fired test pieces. Look for defects like crawling or blistering, which may indicate that the glaze isn’t food-safe. Moreover, analyze color, texture, and finish. Does it match your expectations?
Document Your Findings: Take notes of each test’s results, including glaze mixes and application methods. This will serve as a valuable reference for creating your final pieces and help ensure that you achieve the desired look while maintaining food safety.
Application Techniques
From brush to dip – which method reigns supreme?Now that your food-safe ash glaze is ready, explore various application techniques to achieve stunning finishes on your pottery. Each method imparts a unique visual effect, enhancing your creative expression.
Brush Application: Start by selecting a soft, natural-bristled brush. Dip it into your glaze and apply smooth, even strokes. This technique allows for control over thickness; apply multiple layers for depth, or create patterns by adjusting your brush technique. For instance, a fan brush can produce delicate textures, while a broader brush delivers a more uniform glaze.
Dipping Method: Submerge your piece into a bucket of glaze for a quick and even coat. Ensure your pottery is well prepped and dry, then lift it out, allowing excess glaze to drip off. This method is perfect for achieving a consistent and uninterrupted surface, making it ideal for larger pieces.
Spraying Technique: For intricate designs, transfer your glaze to a sprayer. Adjust the nozzle to control the spray pattern. Layer thin coats for complexity, and create a visually appealing ombré effect by varying the distance from the piece as you spray.
Experiment with these techniques to see which one complements your style and glaze best!
Your Journey to Beautiful Pottery Begins!
With your new knowledge of creating food-safe ash glazes, you’re ready to enhance your pottery creations. Embrace the process, give it a try, and don’t forget to share your results. Happy glazing, and may your art flourish!


This guide is super helpful! I’m planning to use ash from my garden. Do you think it’ll work?
I’ve tried it before, and it worked! Just keep an eye on the color when fired.
Garden ash can work, but make sure it’s clean and not mixed with any chemicals or treated wood.
Awesome guide! I’ve always been intimidated by ash glazing but this made it seem so approachable. Can’t wait to try it out! Do you think I can use wood ash from my fireplace? 🤔
Glad you found it helpful, Liam! Yes, you can use wood ash from your fireplace, just make sure it’s free of chemicals!
I tried it with my fireplace ash and it worked out great! Just remember to sift it well.
Okay, so I’m really excited to try this! But how do I test my glaze? I don’t want to ruin my beautiful pottery! 😱
Definitely. I learned that the hard way. Spare tiles are your friend!
Great question! It’s best to test on a small piece first before applying it to your main project.
Great info! I’ve been collecting ash for a while, but I’m not sure if it’s the right type. Any tips on that?
The guide mentions using softwoods like pine for a better glaze. If it’s hard wood, it might not work as well.
I’ve heard that mixing different types of ash can give some cool results too!
I love pottery, but I’ve never tried glazing before. This step-by-step breakdown is a game changer! I’m curious, though, how do you know if the ash is good quality?
Yeah, I wonder about that too. I guess experimenting is part of the fun!
Quality is key! Look for ash that is light in color and has a fine texture. Avoid any ash that smells weird or has leftover debris.
Thanks for this! I’m a beginner, so all this info is super helpful. Just a heads up, though, can you clarify the application techniques? Like, how thick should the layer be?
You’ll want a thin, even layer—about the thickness of a credit card should do!
I usually do a couple of coats for added depth. Just make sure to let it dry in between!
I’m really here for the aesthetic! Ash glazing looks so rustic and beautiful. I just hope I don’t mess it up! 😂
It’s all about practice! Don’t be too hard on yourself if it doesn’t turn out perfect the first time.
And remember, every piece tells a story. Embrace the imperfections! 😊
I gotta admit, I’m a bit skeptical about using ash. It sounds cool but a bit messy too. Anyone had bad experiences?
It can be messy, but if you prep well, it’s manageable! Just wear an apron.
I had one fail, but it taught me a lot. Just embrace the trial and error part of it!
I’m a bit confused about the mixing part. Do I just throw everything together and hope for the best? 😂
Exactly! Just take your time, it’s all about the right texture. You got this! 💪
Haha, not quite! You’ll want to gradually add water to your ash while mixing until you reach a creamy consistency.
Wow, this is so cool! I’ve always wanted to do ash glazing. Quick question, how do I know when the glaze has set properly?
And don’t forget to check the color after firing! It can change a lot.
Great question! Usually, you’ll know it’s set when it’s dry to the touch and you can see the ash texture.