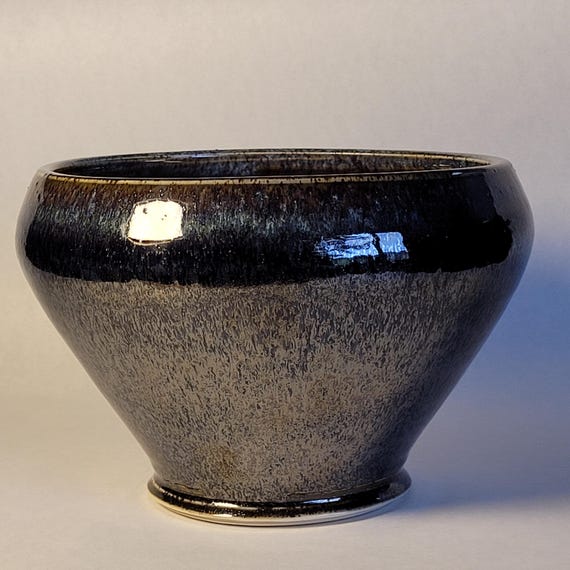
Unlock the Secrets of Oil Spot Tenmoku Glazes!
Dive into the art of firing ceramics with unique oil spot tenmoku glazes for stunning results. This guide will walk you through every step of the process, ensuring your pieces are as beautiful as they are functional. Get ready to create breathtaking masterpieces!
What You’ll Need to Get Started
Choosing the Perfect Clay Body
Not All Clays Are Created Equal – Here’s Why!Select a stoneware or porcelain clay body for the best results with oil spot tenmoku glazes. These clays provide a balanced composition that enhances the glaze’s interaction during firing, leading to desirable surface effects.
Consider high-fire stoneware with a smooth texture. Clays like cone 10 stoneware not only withstand the temperatures required for these glazes but also allow the intricate details of the oil spots to shine. Avoid clays with too much grog or coarse texture, as they may dull the glaze’s visual appeal.
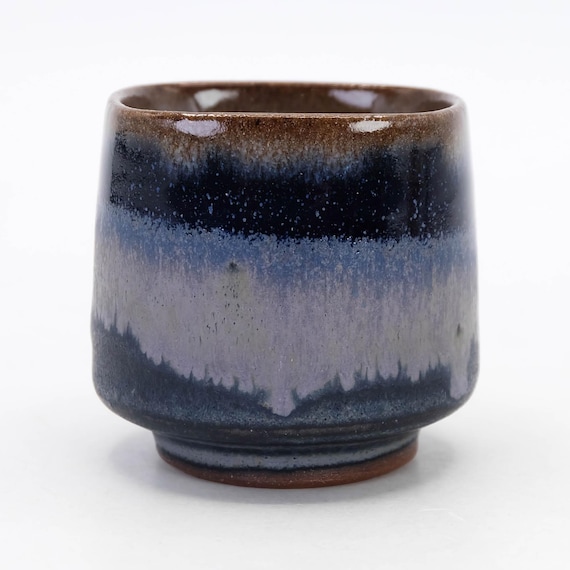
Try a darker clay body as well. Clays like brown stoneware can produce striking contrasts with tenmoku glazes. The dark undertone can make the rich, reflective qualities of the glaze pop even more dramatically.
Experiment with test tiles to see how different clay bodies interact with your chosen glazes. Create small pieces using various clay bodies and glaze combinations. Observe their fired results to choose the perfect base for your final masterpieces. This hands-on exploration will inform your choices and boost your confidence.
Mastering the Glazing Technique
The Right Techniques Can Transform Your Work – Here’s How!Prepare your workspace to ensure a clean and organized area for glazing. Gather all your materials: oil spot tenmoku glazes, brushes, sponges, and your bisque-fired pottery.
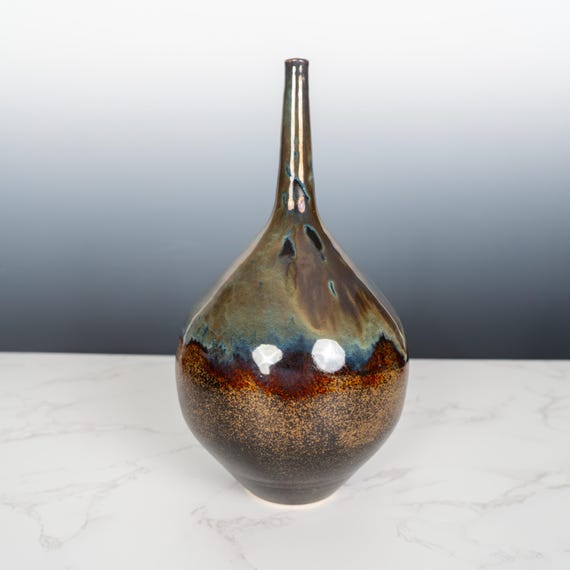
Layer the glaze intelligently. Start with a base coat of a dark tenmoku glaze. This foundation is crucial, as it enhances the contrast and depth of the oil spots. Apply a second layer of a lighter tenmoku glaze on top, ensuring not to completely cover the first.
Experiment with different application methods. Use a spray technique for an even coverage or a dipping method for a thicker result that encourages pooling—both will produce unique effects. For a more controlled approach, brush on the glaze, allowing you to target specific areas.
Incorporate texture on the surface. Sprinkling ash or using a sponge to dab the glaze can create exciting textures, accentuating the oil spots during firing. For added depth, try using a wax resist technique before glazing to prevent unwanted areas from being covered.
Practice and patience are key. As you layer and apply, remember that the magic of oil spots often comes from experimentation. Enjoy the process and let your creativity flow!
Preparing for the Firing Process
Don’t Leave Anything to Chance – Preparation is Key!Load your kiln thoughtfully to achieve the best results with your oil spot tenmoku glazes. Start by arranging your pieces in a way that promotes even firing. Avoid stacking too closely or overlapping, which can trap heat and lead to uneven results. Use kiln furniture like shelves, posts, and plates to create a stable structure that encourages airflow.
Ensure proper airflow within the kiln. Good ventilation is crucial for achieving the unique dynamic of oil spots in tenmoku glazes. Use kiln stilts where necessary, especially for smaller pieces, to elevate them off the kiln shelf. This allows for heat to circulate around them freely.
Preheat your kiln gradually to avoid thermal shock. A slow ramp-up in temperature helps the clay expand evenly and prevents cracking. Aim for a temperature rise of about 100°F (38°C) per hour until you reach your target firing temperature.
Double-check your kiln’s calibration using a pyrometer. Accurate readings ensure that your pieces reach the optimal temperature for the glaze reactions you desire. Following these steps leads to spectacular, surprise-free results when your masterpieces emerge from the kiln!
Firing Your Ceramics Like a Pro
The Magic Happens Here – Are You Ready?Program your kiln for cone 10 firing, aiming for a peak temperature of around 2381°F (1305°C). This is essential for oil spot tenmoku glazes to develop their characteristic effects. Slowly ramp up the temperature—incrementing by 100°F (38°C) per hour until you reach 1800°F (982°C).
Transition to reduction by switching to gas or reducing the oxygen in an electric kiln once you hit around 1800°F (982°C). This is when the magic happens! The reduction atmosphere enhances oil spot formation, allowing those beautiful metallic flecks to emerge during the cooling phase.
Monitor your kiln’s progress closely. Regularly assess the temperature and atmosphere with your pyrometer; subtle changes can lead to dramatic differences in results. If needed, make slight adjustments to compensate for temperature variances.
Timing is crucial! Hold the peak temperature for at least 60-90 minutes to allow the glaze to fully mature, ensuring the oil spots develop vividly. The firing process can be a dance of precision. For example, a ceramist I know swears by this technique and achieved stunning results after carefully timing their reduction phase.
Stay attentive, enjoy the experience, and trust the process as your pieces transform into vibrant masterpieces!
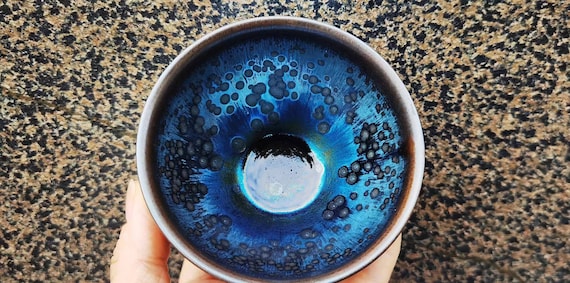
Unveiling Your Masterpieces
The Moment of Truth – What Will You Find?Wait patiently for your kiln to cool completely before unloading. This step is vital! Rapid temperature changes can crack your pieces, so give it time—ideally, until the kiln is around 300°F (149°C).
Carefully open the kiln door. Use heat-resistant gloves and slowly lift the lid or door. Take a deep breath and enjoy the anticipation.
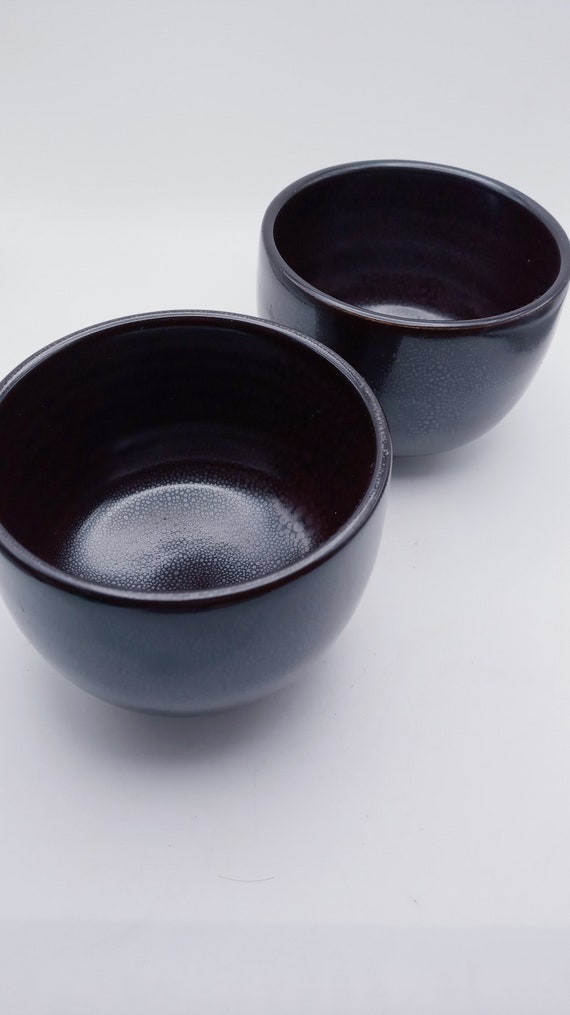
Assess your creations one by one. Look for those stunning oil spots and unique textures you worked so hard to create. If the glaze is too dull, consider adjusting your technique during future firings, maybe by experimenting with different clay bodies or adjusting the application method.
Troubleshoot common glaze issues. If you find areas that are too thin or lacking in texture, identify whether the glaze was applied insufficiently or if there were issues during the firing. Note what worked well and what didn’t for your next batch.
Share your findings with fellow potters! A supportive community will provide insights and suggestions that can elevate your future projects. Each new batch is a step toward mastering the art of oil spot tenmoku glazes!
Congratulations, You’re Now an Oil Spot Glaze Expert!
With these steps, you’re equipped to create stunning ceramic pieces using oil spot tenmoku glazes. Don’t hesitate to experiment and showcase your creativity! Share your results with the community and inspire fellow artists—let’s celebrate your journey together!


I’m loving the tips in this guide! But can someone clarify the firing temps? I don’t have a kiln that goes super high. 😅
I’ve fired at lower temps before, and it still looked good! Just keep an eye on the timing.
No worries, Samantha! You can still achieve good results at lower temps, just might need to adjust the glaze recipes.
I think I’m cursed! None of my pieces ever come out right. Is it just me? 😂
Hey, you’re not alone! I had a few disasters too! Just keep experimenting!
Hang in there, Nathan! It takes practice. Maybe try keeping a firing journal?
Cursed? Nah, just learning! You’ll get there!
This is some next-level stuff! But do I really need to worry about the clay body? I thought any clay would work. 🤔
Yeah, I used a stoneware clay once, and the glaze didn’t turn out as expected. Definitely do some research!
Great question, Tommy! The clay body does affect the glaze results, so it’s worth considering.
I loved the section on unveiling your masterpieces! It’s like Christmas morning when you open the kiln! 🎉 Any tips for avoiding disappointment?
Yeah, I learned to lower my expectations a bit. Helps a ton! 😂
Absolutely, Emily! Patience is key. Also, check your kiln’s calibration.
Wow, this guide is super detailed! I’ve always struggled with getting those oil spots right. The section on mastering the glazing technique really opened my eyes. Can’t wait to try it out! 😍
I feel you! I struggled with it too until I figured out the right clay body. What clay are you using?
Thanks, Lisa! Glad you found it helpful. Let us know how your next firing goes!