Up to 40% of glaze experiments don’t behave as expected, so we turn to cold finishes for control. Slips, underglazes, and stains let us design surfaces before firing and rescue ideas that glaze chemistry complicates.
In this playbook we share materials, safety basics, and repeatable surface prep. Then we give reliable slip recipes, application methods, and decorative effects that work across bodies.
Next we cover underglaze strategies: mixing, painting techniques, and troubleshooting to keep color true. Finally we explore stain tricks and hybrid approaches—layering, chemical reactivity, and finishing moves that expand our palette.
Practical, studio-tested, and concise, this guide helps us make expressive, predictable surfaces every time and reliably.
Mastering Slips, Stains & Underglazes: Techniques You’ll Love
1
Getting Oriented: Materials, Terminology, and Safety
Key terms we use (quick and practical)
Slip: A clay-in-water suspension (typically clay + water) used for joining, casting, or surface coating. Think of it as “liquid clay.” We keep slips unfired or applied to greenware/bisque.
Engobe: A slip formulated specifically as a coating — often with added flux or white body clay — to change color/texture before glazing. It’s a functional surface layer, not just decorative.
Underglaze: A pigmented, often fluxed material made to sit under a transparent glaze. It’s color-first and designed to remain stable through firing.
Ceramic stain: Manufactured oxide/ceramic pigments (e.g., chrome, cobalt, cadmium-based mixes) ground for consistency. They’re used to tint slips, engobes, or glazes and behave more predictably than raw oxides.
Practical tip: when in doubt, treat a formula as an underglaze if it’s pigment-first and designed to be glazed over, and as a slip/engobe if it’s meant to act like clay.
Clay bodies and how they behave
Earthenware: Highly absorbent, low fire, takes bright underglaze color well but can bleed; watch shrinkage mismatch.
Stoneware: Middle ground — good for engobes/slips, more forgiving with fit.
Porcelain: Smooth and less absorbent; slips can crawl if too thick or if the body is too vitrified.
Grog and surface texture matter: heavy grog prevents fine detail in painted work; smooth bodies are best for precise brushwork. Always test your finish on the actual body and bisque level you’ll use.
Tools, vehicles, and additives
Brushes: Hake for washes; synthetic rounds (e.g., Purdy-style synthetics) for detail; natural bristle for slip scraping.
Sprayers/airbrushes: Small work — Iwata-style airbrushes; larger coverage — Earlex HVLP or Wagner-type HVLP. Adjust PSI and nozzle size for viscosity.
Sieves: 80–200 mesh depending on desired smoothness (120 is a good general-purpose screen).
Deflocculants: Darvan 7 and sodium silicate are common — they lower viscosity so we can add less water and retain plasticity. Add a little at a time; test flow and settling.
Vehicles: Water is common; for longer open time or glazing, we use proprietary underglaze mediums or small amounts of glycerin.
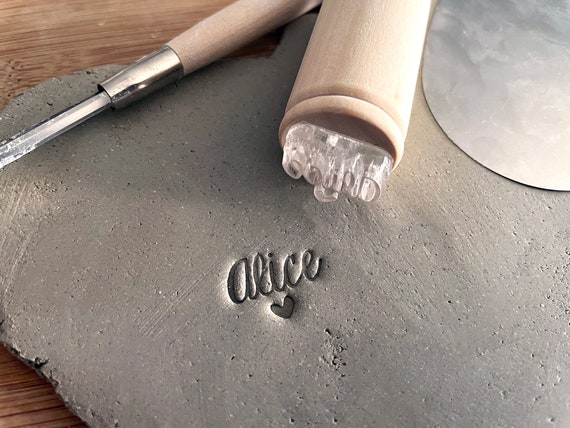
Best for Monograms
Acrylic Monogram Pottery Stamp with Handle
Ideal for small monograms and signatures
We offer a compact acrylic monogram stamp that works on clay, play dough, cookie dough, and soap, and comes with a wood handle. It’s perfect for adding personalized initials to small ceramic pieces or other handmade crafts.
Storage and labeling: keep pigments/stains in airtight, labeled containers; date mixed slips and mark viscosity.
Safety basics (non-negotiable)
Dust control: Wet cleanup, HEPA-filtered vacuum (Shop-Vac with HEPA), and avoid dry sweeping.
Respiratory protection: NIOSH N95 for general dust; P100 for silica-rich work or extended exposure. Use respirators when sanding, mixing dry stains, or spraying.
Ventilation: Local exhaust or spray booth for airbrushing; outdoors or a ventilated room for HVLP sprayers.
PPE: Safety glasses, nitrile gloves when handling stains, no eating/drinking in the studio.
Store toxic pigments (cadmium, chrome) separately and consider alternatives when possible.
With vocabulary, a compact tool kit, and basic safety in place, we’re ready to set up surfaces and repeatable prep methods in the next section.
2
Surface Prep: Setting Up for Repeatable Results
Getting predictable cold finishes starts long before pigment hits clay. Surface condition and timing are the two levers we use to control absorption, adhesion, and final texture. Here’s how we set pieces up so the same slip, underglaze, or stain behaves the same way every time.
How stage affects absorption & adhesion
Leather‑hard: Moderately absorbent. Slip sits and bonds well without sinking in — great for brushwork and sgraffito. We use this stage for crisp lines and added clay decoration.
Bone‑dry: Highly absorbent and thirsty. Underglazes can “grab” and dry dull/patchy if not thinned; slips may need more water or a sealing wash. Use carefully when you want a matte, blended look.
Bisque: Low absorption (depends on bisque temp). Underglazes applied to bisque need better adhesion strategy—thin coats and light sanding if necessary.
We learned this the hard way with porcelain mugs: a heavy engobe on bone‑dry porcelain crawled into islands. The fix was two thin coats on leather‑hard, then a touch of burnishing for a smoother finish.
Prepping the clay: cleaning, burnishing, smoothing
Clean: Remove dust with a soft brush or damp sponge just before decorating.
Smooth: Use damp sponges for clay bodies with grog; use a metal rib on porcelain for ultra‑smooth results.
Burnish: Rub with a smooth stone or metal spoon to compress surface and reduce porosity—excellent when you want a satiny, slip‑resistant base.
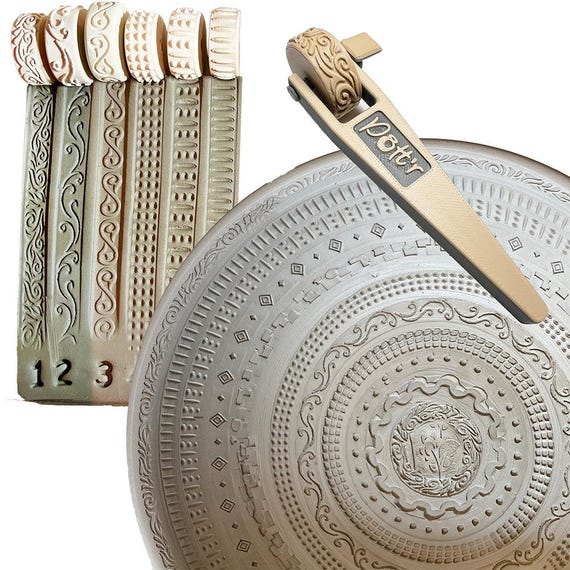
Must-Have
Set of Decorative Pottery Border Rollers
Multiple roller patterns for embossing and texture
We provide a set of pattern rollers with a handle to quickly add consistent borders and textures to clay surfaces. The rollers speed up decorating and give professional-looking detail to bowls, vases, and other ceramic pieces.
Controlling viscosity for brushing, dipping, spraying
Brushing: Aim for a creamy, paint‑like flow — no drips. Test with a one‑inch swipe: it should self‑level in 5–10 seconds without sagging.
Dipping: Thin to a milk‑consistency so it drains evenly; watch for puddles at rims. We use a small deflocculant rather than adding excess water to keep clay content high.
Spraying: Follow manufacturer recommendations (Iwata Revolution for detail, Earlex HVLP for big forms). Strain through 80–120 mesh and thin until it atomizes cleanly at your chosen PSI (do a 6–8 inch test spray).
Measurement cues & common problems
Coverage: Note how many coats to hide the clay body in standard lighting.
Sandiness: Rub a dry swatch — grit indicates insufficient sieving.
Drying times: Record minutes to tack and to dry between coats in your studio humidity.
Preflight checklist for repeatability
Confirm stage (leather‑hard/bone‑dry/bisque)
Clean and smooth surface; burnish if needed
Strain and test viscosity (swipe + tilt test)
Do a small test tile and label it with time, coat count, and dilution
With those checks in place we move on to applying slips and underglazes with confidence, knowing we can reproduce the same look tomorrow or next season.
3
Slip Craft: Recipes, Application Methods, and Decorative Effects
Go-to slip recipes & troubleshooting
We keep recipes simple: weigh your dry clay, add water slowly while mixing to target a working consistency—creamy for brushing, milk‑thin for dipping. Strain every batch through 80–120 mesh. If you use a deflocculant (Darvan 7 or sodium silicate are common), add in very small increments and age the slip a few hours to stabilize. Quick checks:
Too thin/sagging: concentrate by letting solids settle or add a pinch of bentonite; reduce deflocculant.
Crawling/islands: contamination (oils, soaps) or overthick slip; clean the piece and try thinner coats.
Grit/sandiness: regrind and re‑sieve; coarser clay bodies need finer milling for smooth slips.
Always make a labeled test tile (stage, coat count, dilution) — it saves us from surprises in bigger runs.
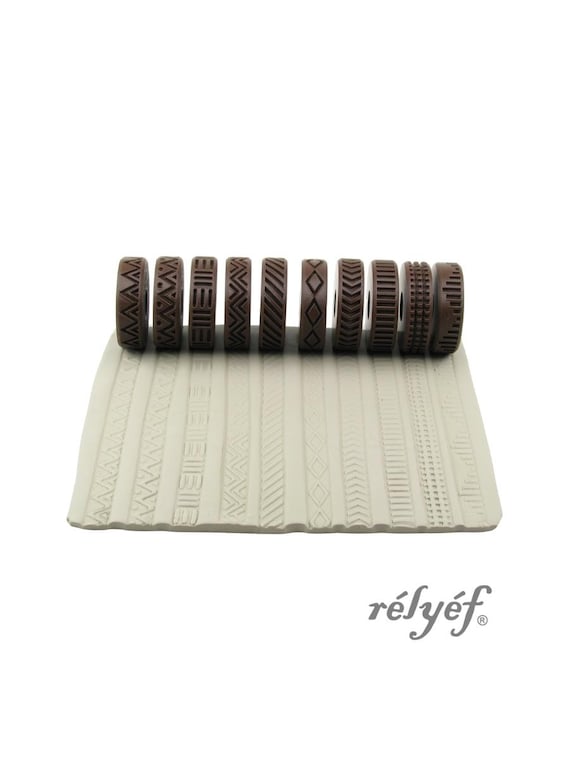
Eco-Friendly
Debossed Lines Clay Roller Texture Set
Eco-friendly bioplastic rollers for crisp debossing
We include ten debossed-line texture rollers and an ergonomic handle made from ecological bioplastics, ideal for ceramics, polymer clay, and soap. The set comes with instructions and fits standard 14mm rollers for comfortable, precise decorating.
Brushing: use a mix of flat synthetic and natural bristle brushes; two thin, cross‑grain coats work better than one heavy one. Let tack develop between passes.
Dipping: stir gently, dip straight down and lift steadily; drain long enough to avoid rim puddles. Thin slips drain more evenly.
Pouring/trailing: use a narrow spout or slip trailer bottle for controlled lines and pools. Practice on test forms to tune pressure.
Slip‑casting: control slurry viscosity for good mold draw—monitor plaster suction and keep molds clean to avoid uneven absorption.
We’ve found an Iwata detail sprayer for thin, atomized slip effects and an Earlex for broader coverage when spraying is preferred.
Decorative approaches & layering ideas
Sgraffito: apply an even slip, let it firm to leather‑hard, then carve with a needle tool for clean contrast.
Mishima (inlay): incise lines, fill with contrasting slip, scrape smooth when leather‑hard for crisp inlay.
Resist techniques: wax, latex, or paper resist to preserve areas; remember combustibles burn out in firing—clean before glazing.
Slip‑pulls & textures: lay a thick band of slip and pull with paper or vinyl for feathered edges or “teardrop” effects.
Layered slips: alternate light/dark slips or reactive (iron‑rich) over creamy bases for depth—varying drying times gives soft edges.
Practical firing considerations
Thickness: heavy slips (>1–2 mm wet) increase risk of warping and blowouts; build up with multiple thin coats.
Clay compatibility: match shrinkage—porcelain slips on stoneware can craze or flake if shrink rates differ.
Drying: dry slowly (cover with plastic) and support large flats to prevent cupping.
Crazing/blowouts: ensure fully dry before bisque and avoid sealing thick slips under glazes that trap gases.
Try deliberate “mistakes” (odd slips, layered colors, unusual tools) on spare tiles—they often become signature moves. Up next we’ll take color control further as we move into underglaze mixing, painting, and problem solving.
4
Underglaze Strategies: Color Mixing, Painting, and Problem Solving
We dig into how underglazes behave and how we coax consistent, vibrant color from them. Below we cover opacity vs. transparency, practical palette building, painting methods (washes, dry‑brush, stipple, stamping, layered painting), and the studio fixes we rely on when things go sideways.
Opacity, transparency & building a palette
Underglazes range from opaque (great for flat blocks of color) to semi‑transparent (ideal for glazes and depth). We build palettes by:
Choosing a reliable base brand (Mayco, Amaco or Duncan have predictable lines).
Starting with three values per hue: light (tint), mid, dark (shade).
Making 1″ test swatches glazed and unglazed—this shows true fired value.
Mix by weight for repeatability (a kitchen scale is worth it). Small additions of commercial underglaze medium or distilled water thin for washes; thicker, brushable body produces solid strokes.
Artisan Made
Handcrafted Vibrant Glaze Stoneware Coffee Mug
Uniquely glazed, each mug is one-of-a-kind
We hand-throw each stoneware mug and apply vibrant glaze streaks, so every cup features its own drips and color shifts. The result is a durable, artistic mug that brings handmade charm to daily coffee or tea.
Layered painting: build from light to dark; semi‑transparent underglazes over opaque bases give depth.
Use small synthetic rounds (sizes 0–4) like Princeton Select for linework; flats for fills.
Firing interactions & application thickness
Apply thin, even coats—heavy wet builds (>1mm) risk crawling or pinholing under clear glaze. Bisque hardness matters: we bisque to cone 04–06 for consistent absorption. Clear, glossy glazes intensify and slightly darken underglaze color; textured or satin clears mute saturation. Always test your underglaze + glaze combination.
Preserving fine lines & details
Paint lines on leather‑hard or well‑absorbed bisque to avoid bleeding.
Use underglaze pencils or a size 000 sable for detail.
Seal delicate lines with a light, satin clear sprayed from 6–8″ away if you need a protective layer before final glazing.
Troubleshooting quick fixes
Running: let underglaze dry longer, thin clear glaze, or apply fewer clear coats.
Fading/dulling: increase coat count, switch to a brighter brand, or use a glossy clear.
Pinholes: skim the surface to remove bubbles, thin coats, or add a light wash of slip to fill pores before glazing.
Color shift: test glaze/temperature combos; a thin transparent topcoat can stabilize colors.
These tactics get us reliable marks and lively color; next we’ll explore how stains and hybrids extend this toolkit into reactive, layered finishes.
5
Stain Tricks & Hybrid Approaches: Layering, Reactivity, and Finishing
Stains are not just “underglaze cousins.” They’re concentrated, frit‑bound colorants (think Mason Stains) that behave more like pigments than paint — more stable in glazes, often more saturated, and capable of subtle reactivity. We use them where permanence, translucency, or surprising surface chemistry matter.
Using stains as washes and glazes
Dilute stain powder into water, flow medium, or a commercial glaze base (start 1–3% by weight for a wash).
For a stained “wash,” thin to tea‑strength and apply in layers, letting each dry. This gives translucent tonality without hiding texture.
To make a colored glaze, mix stain into a clear glaze base (we start at 2–5% stain by weight and test up). Stain can darken or shift in the melt — always test.
Example products: Mason Stains for consistency; Ferro/Mason frits in clear bases for reliable melts.
Mixing stains into slips & engobes
Add stain powders to your slip body by weight (g/100g slip) and sieve. Small doses (0.5–3%) create tints; higher doses increase opacity.
Use stains in leather‑hard slips for sgraffito or in engobes as underlayers for carved or textured pieces — they sit matte and can be revealed with wiping.
Creating reactive mottles & variegated surfaces
Reactivity comes from interactions with the flux in the glaze or slip. Layer a stain wash over a manganese‑rich slip or an iron‑speckled engobe for mottling.
Try salt/different alkalinity in surface washes (e.g., a thin soda wash) to provoke spotty variegation—test to control scale and density.
Combining stains with underglaze layers
Build contrast: opaque underglaze base + semi‑transparent stain wash over top to add shadow or age.
Use stains to tone down bright underglaze edges—wipe a dye‑thin stain into crevices to “read” details.
Subtle antiquing, rubbing & wiping‑back
Apply a stain wash, then immediately wipe with a damp cotton rag or soft nylon pad to leave pigment only in recesses.
For selective highlights, rub back with very fine steel wool or a leather burnisher once bone‑dry (before firing) or gently after bisque.
Post‑firing cold interventions & food‑safety
For decorative pieces, water‑based acrylics or clear polyurethanes can seal stain surfaces; these are NOT food‑safe.
For functional ware, we avoid cold sealants — final fired glazes formulated and tested for food safety are the only reliable route.
Our testing protocol (fast & repeatable)
2×2″ test tile grid: vary stain %, application method, and topcoat; label with weight, kiln cone, glaze.
Photograph and log results (lighting, camera settings).
For functional surfaces, run abrasion and crock tests; for anything contacting food, send representative samples for leach testing before production.
Next, we pull these techniques together into a playful, methodical plan to run in the studio.
Putting It All Together: A Playful, Methodical Path Forward
We recommend a simple roadmap: begin with small tests, document materials and firing or drying conditions, and change only one variable at a time. This methodical play keeps surprises useful and reproducible, letting us isolate what really shifts color, texture, or reaction.
We also encourage embracing accidents as starting points, adapting recipes, and sharing finds with our community. Keep clear notes, iterate, and celebrate oddities — together we expand our cold‑finish vocabulary and refine playful, reliable approaches for future experiments today.
Okay, I have a rant and a compliment.
Rant: the Debossed Lines Clay Roller Texture Set link made me spend 45 minutes adding textures to everything in my studio. My partner is not thrilled. 😅
Compliment: the Surface Prep section changed how I wedge and prep — my glazes are so much cleaner now.
Questions: anyone has tips for cleaning acrylic stamps if you’re stamping on wet slips? They get gummy on me.
Haha, bribe accepted. Those mugs are gorgeous.
Also consider keeping a couple of ‘studio-only’ stamps that you don’t use for finished pieces — easier to sacrifice for experiments.
Love the texture spree story! For acrylic stamps: rinse immediately with warm water, use a soft brush and a tiny amount of dish soap if gummy. Avoid harsh solvents on acrylic. Dry fully before storing.
I’ve found that a toothbrush and a bit of glycerin in the wash water helps with the slip residue.
Pro tip: keep a small tub of water with a splash of vinegar to loosen up dried slip on tools. Works on stamps too.
My partner loves the texture too now. Win-win? Maybe bribe them with a handmade coffee mug (Handcrafted Vibrant Glaze Stoneware Coffee Mug, anyone?)
I tried the hybrid layering approach last weekend: slip base, underglaze strokes, then a transparent glaze. It came out way better than expected.
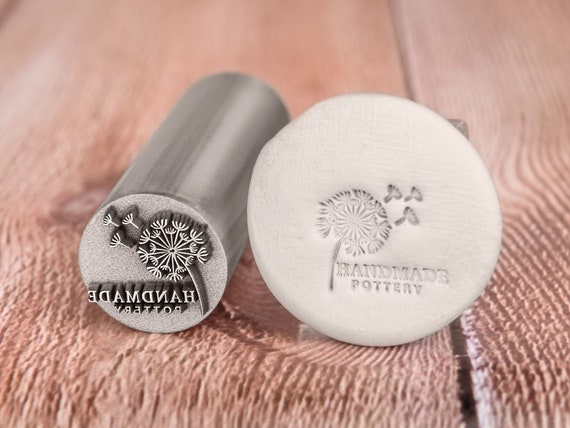
Two notes: 1) Don’t overwork the underglaze when painting fine lines, it lifts the slip. 2) The Personalized Pottery Logo Stamp for Makers left a crisp mark even after layering.
Happy accident and learned a lot.
Congrats on the success! For transparency, we usually recommend low-iron clear glazes for lighter bodies; test tiles are essential since some clears amber on certain clays.
Nice! What transparency glaze did you use? I’m always hunting for a clear that doesn’t amber.
Constructive critique: the article assumes a lot of access to tools (rollers, stamps, etc.). Maybe add DIY alternatives? Like how to make a border roller from simple materials.
Also: loved the honesty about ‘this might not work on YOUR clay’ — felt refreshingly real.
Great call. We’ll add a small DIY section for budget-friendly tools and quick home-made texture ideas.
Hot glue + twine = surprisingly cool textures. Craft-store hacks for the win.
I made a DIY roller from a dowel and hot-gluing elastic bands. Cheap and kinda ugly but works in a pinch.
This guide was exactly what I needed — especially the Slip Craft section.
I loved the step-by-step recipes and the decorative effects part (the sgraffito over a colored slip? chef’s kiss).
Also, I ordered the Set of Decorative Pottery Border Rollers after reading this and they totally changed how I finish rims.
Minor nit: could use a quick printable cheat-sheet for the slip viscosities.
Overall: super practical and inspiring!
Same here — would pay for a laminated pocket guide. Also, what rpm do you use for slip-thinning? I always overdo it.
Thanks, Emily — glad the border rollers tip was useful! A printable viscosity cheat-sheet is a great idea, we’ll see about adding a one-page PDF to the post soon.
I mix by eye (terrible, I know) but try to get it to the thickness of heavy cream. A small whisk or an old milk frother helps a ton.
Great read. Stain Tricks = basically magical troubleshooting with adult science kits. Loved the humor. 😂
Short and sweet: love the paintable underglaze color mixing section. I finally stopped getting muddy browns when mixing two bright colors.
Question: the Acrylic Monogram Pottery Stamp with Handle — will the handle warp if left in a humid studio for months?
Good question — most acrylic handles are stable but can develop slight warping in extreme humidity over long periods. Store in a dry drawer or hang them up to keep them flat.
Underglaze mixing tip was gold. Quick question though — when you talk about reactive layers in the Stain Tricks chapter, do those reactions happen only in the bisque stage or after glaze firing? I’m trying to get a subtle speckle without crazing.
Also: anyone tried layering an acrylic monogram pottery stamp impression before underglazing? Curious about how the texture holds paint.
Adding: always test on your clay body and glaze. The same stain reacts differently across bodies/fluxes — small tiles are your friend.
Great points. The reactive effects mostly develop during the glaze firing (maturation of fluxes), but base application and how porous the bisque is will influence penetration. For subtle speckle, try a thin stain wash and a resist coat in places. As for the acrylic monogram stamp, it can work on leather-hard clay; the acrylic won’t survive firing, but the impression will hold underglaze nicely.
I do speckle by flicking a fine suspension of stain with an old toothbrush right before dipping. Less chance of crazing compared to slapping on thick stain.
If you want less reaction, choose stains labeled ‘stable’ or ‘non-reactive’ — they’ll behave more predictably.
Re: monogram stamp — I used the Personalized Pottery Logo Stamp for Makers on leather-hard ware and then painted underglaze into it. Fired fine, very crisp.
Putting It All Together felt like a friendly coach gently yelling ‘do the tests first!’
One constructive thing: could you add a short troubleshooting flowchart? Like if underglaze cracks -> check thickness, if slip peeling -> check bisque porosity, etc. Would save newbies a lot of guesswork.
Totally hear you. A troubleshooting flowchart is on the to-do list. Thanks for the suggestion!
Flowchart + timelapse of a tile test = sold. I’d watch that at 2x speed while mixing stains.
Flowcharts are great. Also a quick video showing a failed tile and the fix would be epic.
Yes please — I spent months learning what ‘peeling’ actually looked like vs ‘crazing’ 😂
Nice overview, but the Safety bit felt a little light. When you say “ventilate and avoid inhaling dust,” can you give more specifics? Like, is a regular window fan enough or do I need a vent hood?
I use a cheap HEPA air purifier and an N95. It’s made a big difference for dust during bisque prep.
Good question. For small studio work, a window fan plus wearing an N95 when sanding/dry-trimming is usually sufficient. For frequent glazing or mixing powders, consider a filtered exhaust or dedicated ventilation. We’ve updated the Safety section with those specifics.
Loved the playful tone in ‘Putting It All Together’ — it made methodical testing feel less like homework and more like play.
One suggestion: a short section on documenting trials (I use a tiny notebook to note ratios, firing temp, and glaze code). Might help readers replicate results.
Also, the Handcrafted Vibrant Glaze Stoneware Coffee Mug in the mentions is gorgeous — anyone know the typical firing range they recommend?
I bought a similar mug; seller told me cone 6. It survived daily dishwasher use for months here.
Cone 5–6 is common, but if it’s a low-fire recipe it’ll say so. If you bought that mug, check the seller’s listing or ask them directly.
Thanks, Clara. Documentation is huge — we’ll add a sample tile test log. Most vibrant stoneware glazes are designed for cone 5–6, but always check the maker’s notes on Etsy or test at your temp.
Added: we’ll include a short reminder to verify firing ranges for any referenced Etsy product — good catch.
A few tiny, random tips from my experiments:
– When layering stains, thin the first layer more than you think.
– The Debossed Lines Clay Roller Texture Set gives very even repeats — worth the cash.
– If underglaze gets grainy, try pushing it through a 100–200µ sieve.
Not a review, just sharing what saved my afternoons.
100–200µ — noted. I was wondering why my brushstrokes looked… textured in a bad way.
Been meaning to buy that Debossed Lines set. Your endorsement tipped me over the edge 🙈
It really does make borders look pro. Highly recommend.
Solid tips — sieving underglaze is often overlooked and makes a big difference in finish. Thanks for sharing!
Also, strainers are great for mixing batches if you’re dealing with clumps from old jars.


Okay, I have a rant and a compliment.
Rant: the Debossed Lines Clay Roller Texture Set link made me spend 45 minutes adding textures to everything in my studio. My partner is not thrilled. 😅
Compliment: the Surface Prep section changed how I wedge and prep — my glazes are so much cleaner now.
Questions: anyone has tips for cleaning acrylic stamps if you’re stamping on wet slips? They get gummy on me.
Haha, bribe accepted. Those mugs are gorgeous.
Also consider keeping a couple of ‘studio-only’ stamps that you don’t use for finished pieces — easier to sacrifice for experiments.
Love the texture spree story! For acrylic stamps: rinse immediately with warm water, use a soft brush and a tiny amount of dish soap if gummy. Avoid harsh solvents on acrylic. Dry fully before storing.
I’ve found that a toothbrush and a bit of glycerin in the wash water helps with the slip residue.
Pro tip: keep a small tub of water with a splash of vinegar to loosen up dried slip on tools. Works on stamps too.
My partner loves the texture too now. Win-win? Maybe bribe them with a handmade coffee mug (Handcrafted Vibrant Glaze Stoneware Coffee Mug, anyone?)
I tried the hybrid layering approach last weekend: slip base, underglaze strokes, then a transparent glaze. It came out way better than expected.
Two notes: 1) Don’t overwork the underglaze when painting fine lines, it lifts the slip. 2) The Personalized Pottery Logo Stamp for Makers left a crisp mark even after layering.
Happy accident and learned a lot.
Congrats on the success! For transparency, we usually recommend low-iron clear glazes for lighter bodies; test tiles are essential since some clears amber on certain clays.
Nice! What transparency glaze did you use? I’m always hunting for a clear that doesn’t amber.
Constructive critique: the article assumes a lot of access to tools (rollers, stamps, etc.). Maybe add DIY alternatives? Like how to make a border roller from simple materials.
Also: loved the honesty about ‘this might not work on YOUR clay’ — felt refreshingly real.
Great call. We’ll add a small DIY section for budget-friendly tools and quick home-made texture ideas.
Hot glue + twine = surprisingly cool textures. Craft-store hacks for the win.
I made a DIY roller from a dowel and hot-gluing elastic bands. Cheap and kinda ugly but works in a pinch.
This guide was exactly what I needed — especially the Slip Craft section.
I loved the step-by-step recipes and the decorative effects part (the sgraffito over a colored slip? chef’s kiss).
Also, I ordered the Set of Decorative Pottery Border Rollers after reading this and they totally changed how I finish rims.
Minor nit: could use a quick printable cheat-sheet for the slip viscosities.
Overall: super practical and inspiring!
Same here — would pay for a laminated pocket guide. Also, what rpm do you use for slip-thinning? I always overdo it.
Thanks, Emily — glad the border rollers tip was useful! A printable viscosity cheat-sheet is a great idea, we’ll see about adding a one-page PDF to the post soon.
I mix by eye (terrible, I know) but try to get it to the thickness of heavy cream. A small whisk or an old milk frother helps a ton.
Great read. Stain Tricks = basically magical troubleshooting with adult science kits. Loved the humor. 😂
Short and sweet: love the paintable underglaze color mixing section. I finally stopped getting muddy browns when mixing two bright colors.
Question: the Acrylic Monogram Pottery Stamp with Handle — will the handle warp if left in a humid studio for months?
Good question — most acrylic handles are stable but can develop slight warping in extreme humidity over long periods. Store in a dry drawer or hang them up to keep them flat.
Underglaze mixing tip was gold. Quick question though — when you talk about reactive layers in the Stain Tricks chapter, do those reactions happen only in the bisque stage or after glaze firing? I’m trying to get a subtle speckle without crazing.
Also: anyone tried layering an acrylic monogram pottery stamp impression before underglazing? Curious about how the texture holds paint.
Adding: always test on your clay body and glaze. The same stain reacts differently across bodies/fluxes — small tiles are your friend.
Great points. The reactive effects mostly develop during the glaze firing (maturation of fluxes), but base application and how porous the bisque is will influence penetration. For subtle speckle, try a thin stain wash and a resist coat in places. As for the acrylic monogram stamp, it can work on leather-hard clay; the acrylic won’t survive firing, but the impression will hold underglaze nicely.
I do speckle by flicking a fine suspension of stain with an old toothbrush right before dipping. Less chance of crazing compared to slapping on thick stain.
If you want less reaction, choose stains labeled ‘stable’ or ‘non-reactive’ — they’ll behave more predictably.
Re: monogram stamp — I used the Personalized Pottery Logo Stamp for Makers on leather-hard ware and then painted underglaze into it. Fired fine, very crisp.
Putting It All Together felt like a friendly coach gently yelling ‘do the tests first!’
One constructive thing: could you add a short troubleshooting flowchart? Like if underglaze cracks -> check thickness, if slip peeling -> check bisque porosity, etc. Would save newbies a lot of guesswork.
Totally hear you. A troubleshooting flowchart is on the to-do list. Thanks for the suggestion!
Flowchart + timelapse of a tile test = sold. I’d watch that at 2x speed while mixing stains.
Flowcharts are great. Also a quick video showing a failed tile and the fix would be epic.
Yes please — I spent months learning what ‘peeling’ actually looked like vs ‘crazing’ 😂
Nice overview, but the Safety bit felt a little light. When you say “ventilate and avoid inhaling dust,” can you give more specifics? Like, is a regular window fan enough or do I need a vent hood?
I use a cheap HEPA air purifier and an N95. It’s made a big difference for dust during bisque prep.
Good question. For small studio work, a window fan plus wearing an N95 when sanding/dry-trimming is usually sufficient. For frequent glazing or mixing powders, consider a filtered exhaust or dedicated ventilation. We’ve updated the Safety section with those specifics.
Loved the playful tone in ‘Putting It All Together’ — it made methodical testing feel less like homework and more like play.
One suggestion: a short section on documenting trials (I use a tiny notebook to note ratios, firing temp, and glaze code). Might help readers replicate results.
Also, the Handcrafted Vibrant Glaze Stoneware Coffee Mug in the mentions is gorgeous — anyone know the typical firing range they recommend?
I bought a similar mug; seller told me cone 6. It survived daily dishwasher use for months here.
Cone 5–6 is common, but if it’s a low-fire recipe it’ll say so. If you bought that mug, check the seller’s listing or ask them directly.
Thanks, Clara. Documentation is huge — we’ll add a sample tile test log. Most vibrant stoneware glazes are designed for cone 5–6, but always check the maker’s notes on Etsy or test at your temp.
Added: we’ll include a short reminder to verify firing ranges for any referenced Etsy product — good catch.
A few tiny, random tips from my experiments:
– When layering stains, thin the first layer more than you think.
– The Debossed Lines Clay Roller Texture Set gives very even repeats — worth the cash.
– If underglaze gets grainy, try pushing it through a 100–200µ sieve.
Not a review, just sharing what saved my afternoons.
100–200µ — noted. I was wondering why my brushstrokes looked… textured in a bad way.
Been meaning to buy that Debossed Lines set. Your endorsement tipped me over the edge 🙈
It really does make borders look pro. Highly recommend.
Solid tips — sieving underglaze is often overlooked and makes a big difference in finish. Thanks for sharing!
Also, strainers are great for mixing batches if you’re dealing with clumps from old jars.