
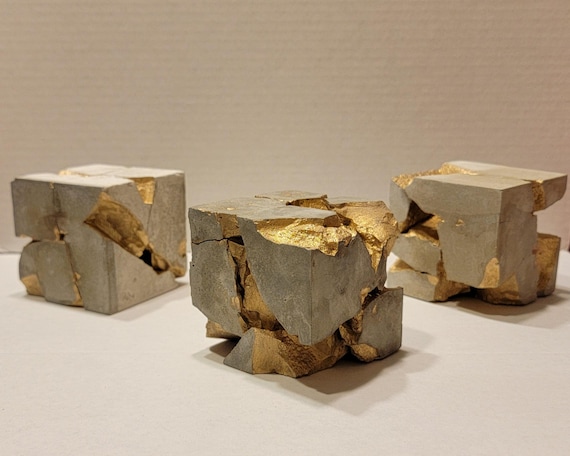
Why Kintsugi? Turn Breakage into Beauty
We embrace Kintsugi as a mindful, sustainable art that celebrates history and imperfection. In this guide, we share our simple gold-mending method—approachable for beginners yet respectful of tradition—so you can turn breakage into lasting, beautiful repairs with patience and intention.
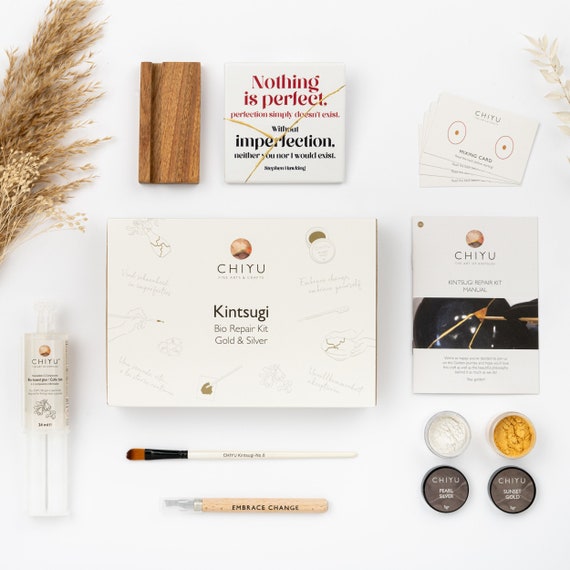
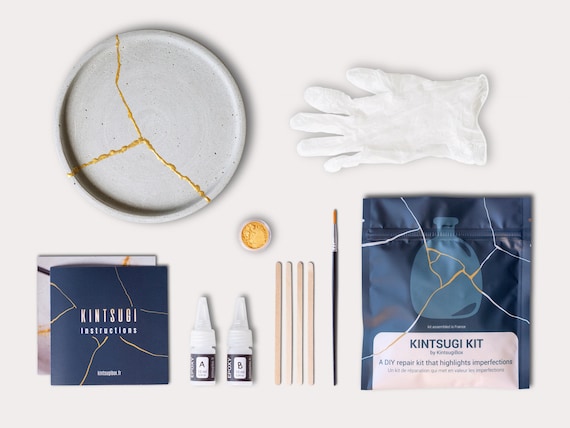
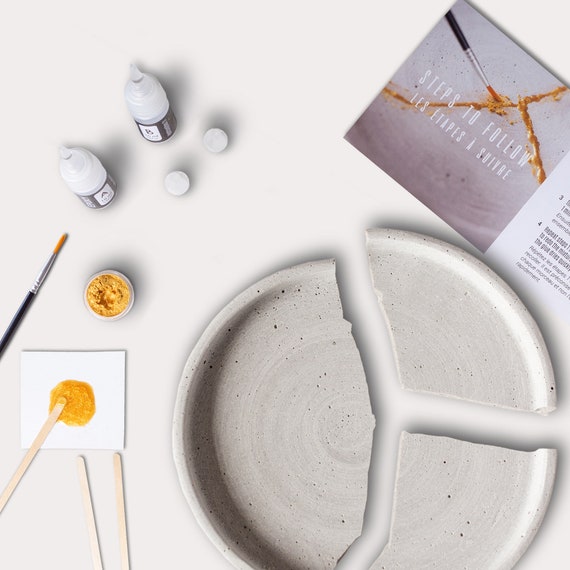
What You’ll Need
We’ll need: broken ceramic; two-part clear epoxy; mixing sticks, small brushes, cotton swabs; fine sandpaper; masking tape; gold leaf, powder, or gold lacquer; nitrile gloves; a steady hand.
DIY Kintsugi: Easy Minimal Epoxy Ceramic Repair
Step 1 — Evaluate the Damage and Plan Your Repair
How bad is it, really? We’ll show you how to tell which pieces can be rescued — and how to map the mend like a surgeon.Inspect the shards carefully. Lay pieces out on a soft, flat surface and photograph the arrangement for reference.
Label or number fragments if there are many. Test-fit pieces gently to understand the original join lines and to spot tiny missing bits.
Identify critical issues to plan your approach:
Decide whether a full reconstruction (gluing all shards) or a partial inlay (filling a void) suits the piece. For example, we once rebuilt a teacup by numbering three wedges and gluing them in sequence—this planning saved time and avoided mismatches.
Step 2 — Clean and Prepare Surfaces for Bonding
Don’t skip cleaning — a tiny speck can wreck a seamless join. Want a stronger, longer-lasting repair? This is where we earn it.Clean the break edges thoroughly — we remove dust, grease, or old adhesive using a soft brush, mild detergent, and isopropyl alcohol. Dry pieces completely and test-fit without adhesive so we understand how everything nests. Reinforce very thin or fragile edges by applying masking tape to the outer surface to hold alignment during bonding.
For example, when rebuilding a saucer with hairline chips, we taped the outside rim to keep everything steady while we worked. Proper surface prep radically improves epoxy adhesion.
Step 3 — Mix and Apply Epoxy Like a Pro
Epoxy is our invisible superglue — but mixed and applied poorly it can ruin the look. Want spotless joints? We’ve got tips.Choose a clear, slow-setting two-part epoxy for longer working time and stronger bonds. Measure equal parts precisely—use small syringes or graduated mixing cups.
Mix the resin thoroughly. Scrape the sides and bottom of the cup while stirring for 60 seconds so the catalyst and resin fully combine. Work in small batches to avoid wasted pot life.
Apply adhesive sparingly to one edge only to prevent squeeze-out. Press pieces together and hold or clamp until the epoxy achieves its initial set (check the manufacturer’s time).
For gaps, add a tiny bridge of epoxy and shape it with a wet wooden stick. Wipe excess immediately with a cloth dampened in isopropyl alcohol to maintain clean lines before curing.
Step 4 — Clean Up, Sand, and Refine the Join
Make the seam disappear (or prepare it for gold) — sanding and filling are where patience pays off.Remove clamps and trim any large epoxy squeeze-out with a sharp craft knife. Hold the blade at a shallow angle and shave off thin layers—avoid digging into the ceramic. For example, we lightly pare away the ridge on a repaired teacup rim rather than gouging it.
Sand the join progressively: start with 180–220 grit to level, move to 320–400 grit to blend, and finish with 600–1000 grit (or 800–1200 for a polished match). Sand gently, keep strokes parallel to the surface, and consider wet-sanding epoxy to reduce dust.
Fill small gaps or chips with tinted epoxy or porcelain filler, let it cure fully per instructions, then sand the repair smooth. The goal is a smooth, contiguous surface so the gold application will sit evenly and look intentional.
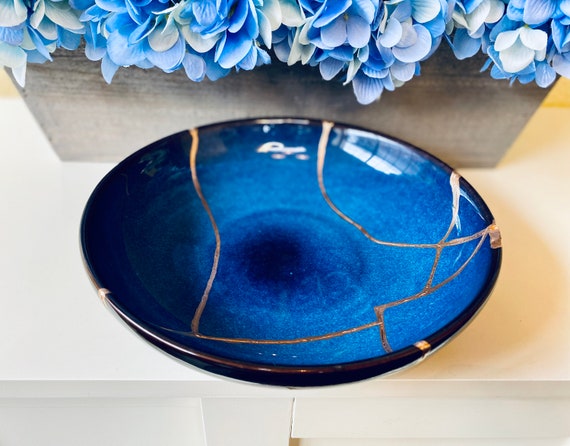
Step 5 — Apply Gold: Real Leaf, Powder, or Gold Paint
Real gold? Gorgeous — but not always necessary. We explain choices and give a simple, beautiful gold-mending shortcut.Choose a gold medium that suits the piece and our budget: real gold leaf for authenticity, gold powder mixed into lacquer for a hand-painted effect, or high-quality gold paint for a practical finish.
Apply an adhesive size in a thin, controlled line over the repaired seam. Wait until the size becomes tacky before proceeding.
Lay real gold leaf gently and press with a soft, dry brush; lift away excess with the same brush. Build powdered-gold or gold paint in thin coats, letting each dry before the next—for example, two thin coats usually looks richer than one heavy coat.
Test color and sheen on a scrap to ensure a harmonious finish.
Step 6 — Seal, Cure, and Care for Your Kintsugi Piece
We don’t just make it sparkle — we make it last. Little finishing steps save future heartbreak.Allow the piece to fully cure exactly as the adhesive and gold medium manufacturers instruct — sometimes 24–72 hours. After curing, apply a clear, compatible varnish or lacquer if the gold needs extra protection; test on a scrap first.
Gently polish any excess sheen with a soft cloth or very fine abrasive (0000 steel wool) only if the finish allows. Inspect seams and joins for weak spots and reinforce with a tiny bead of epoxy if needed.
Follow these care actions:
Document the repair with photos and notes — we record materials, date, and technique so the mend becomes part of the object’s story.
Celebrate the Repair
We’ve transformed damage into design. With patience and these steps, our simple gold-mending method makes repairs that are strong, beautiful, and full of story. Try it, show us your results, and join the community celebrating restored pottery and share widely.


I tried mixing the epoxy outside and everything went sticky because of dust. Rookie mistake. 😅
Also, anyone have a recommendation for a budget gold powder? Prefer small quantities.
I buy small sachets from craft stores online — look for ‘mica gold powder’ if real gold is too pricey. Works well for practice.
Thanks for the heads-up about dust — a clean workspace is key. For budget gold, we can add links to several small-quantity suppliers in the resources section.
I appreciate the cultural note in ‘Why Kintsugi’ — respectful and informative. Made the project feel meaningful, not just decorative.
A suggestion: include a short blurb on ethical sourcing of gold leaf for conscious crafters.
Love this suggestion. Small shops or fair-trade suppliers sometimes have lower-impact options.
Great idea, Priya. We’ll look into adding sourcing recommendations and eco-friendly alternatives in an upcoming revision.
Also, consider using bronze or brass leaf for a different look and sometimes better availability.
Wanted to share a weird thing: after sealing, my gold looked slightly dull. I used a brush-on sealer recommended in the guide. Went back and buffed it with microfibre and it revived.
Maybe mention buffing as an optional final step?
Interesting — I used spray sealer and had a brighter finish out of the can. Different sealers, different outcomes.
Thanks — we’ll add buffing as an optional finishing step and note which sealers respond well to it.
Small nitpick: the mixing ratios image was tiny on mobile. Ended up zooming a lot. Otherwise, solid tutorial.
Also, one of the tips about not touching mixed epoxy with bare hands should be highlighted more — learned that the hard way 🙈
Thanks for the feedback — we’ll enlarge the ratio graphic and add a safety callout about gloves and ventilation.
Yes to gloves and also a respirator if you’re using a high-VOC epoxy. Better safe than sticky!
Loved the step-by-step photos for mixing epoxy — made it way less intimidating. Quick tip: I let my pieces sit for about 24 hours before sanding, seemed to cut down on tiny chips.
Only wish there was a bit more about choosing between real leaf vs powder for beginners. Anyone else tried both?
Same here. Powder is forgiving and cheaper. If you want the authentic look, practice with leaf on cheap pottery first.
Thanks, Emma — great tip about the 24 hours. We kept the gold section brief to avoid overwhelming new folks, but we’ll add a comparison table in the next update.
I tried both — leaf looks way more luxurious but is fiddly. Powder mixed with a little clear varnish is my go-to for small repairs.
Question: for hairline cracks that don’t come apart, is it worth doing kintsugi-style filling or just leave them? I like the blemished look but would love the gold lines too.
If you worry about the crack growing, reinforce from the inside with a tiny bead of epoxy first.
I highlighted a hairline crack on a vase and it looked intentional — like the piece had a story. Go for it if you want a focal point.
Both are valid. If the object is structurally fine and you like the patina, leave it. If you want the aesthetic, a thin epoxy injection followed by gold powder can highlight the line.
Also, consider mixing a bit of pigment into the epoxy to match the ceramic before adding gold on top.
Okay, confession: I glued two pieces together and the seam still shows. Do I need to sand more aggressively or was my epoxy mix off? The guide was great but I kept the gaps small and it still shows.
If the seam shows, first check if you used gap-filling epoxy. Also sand with progressively finer grit — start 120 then 220, finish 400+. A light layer of filler epoxy before the final gold helps too.
This guide honestly made me feel like I could try kintsugi for the first time. The Celebrate section was adorable 😂
I have one question: do you recommend sealing with matte or glossy finish? I like the subtle look, not too shiny.
Matte if you want subtlety. Glossy will make the gold pop more. Depends on the mood of the piece!
Both work — matte gives a softer, antique vibe while gloss is more vibrant. If you’re unsure, test on a shard first.
Tried this last weekend on my grandma’s teacup. Turned out kinda artsy! The handle still wiggles a bit though. 😬
I think I underclamped it. Any clamp suggestions? I hate the idea of putting weights on delicate ceramics.
I used painter’s tape to hold a handle in place while the epoxy set. Cheap and gentle!
Agreed — soft-jawed clamps are ideal. For delicate curves, try elastic bands with scrap foam to distribute pressure evenly.
Use soft jaw clamps or wrap a towel around regular clamps. Rubber bands + foam can work for small curved bits.
This is long but maybe helpful — I ruined my first attempt because I didn’t clean the surfaces well. Lesson learned:
1) Soak and scrub old glue residue
2) Use isopropyl alcohol as the final wipe
3) Clamp gently but for longer than you think
4) Be patient during sanding
5) Seal with multiple light coats
Hope that saves someone else from starter mistakes!
This is gold (no pun). Especially about the alcohol wipe — I skipped it once and the bond failed later.
Clamping longer than the epoxy’s stated set time — yes. Epoxy cures, but strength increases with time.
Fantastic checklist, Hannah — would you mind if we included this as a user-tip box in the guide? We’ll credit you.
Tried the gold paint method — cheap and messy but surprisingly nice result! Do yourself a favor and practice brush strokes on paper first lol.
One more thing: the guide mentions cure times but not humidity. In humid weather my epoxy dried tacky longer.
Good point — humidity and temperature affect cure. We’ll add a small table with recommended temp/humidity ranges for best results.
If it’s humid, try a warm, dry room or a small dehumidifier. Patience helps too!
Haha I almost spilled gold leaf all over my floor. Pro tip: work over a tray so you can recover scraps. Also, the guide’s tip about using a soft brush to lay the leaf is gold — literally.
Ha! A tray is a lifesaver. Glad the soft brush tip helped — it makes all the difference with delicate leaf.
Pro tip: static helps. Rub a balloon on your sleeve and use it to lightly position tiny bits of leaf 😂
Same here — used a shallow baking tray and fished the leftovers back into the booklet. Waste not!