
Why We Love Celadon — A Glassy Green Invitation
We adore celadon for its translucent, glassy green surface and subtle crackle that lets form show through a veil of color. In this workshop we demystify the process and guide potters to celadon-like results in a studio. We set expectations about atmosphere, equipment, the patience required.
We will cover color and chemistry, clay and forms, glaze recipes, application techniques, firing strategies, finishing effects, and testing workflows. Our goal is to give clear, practical steps so you can mix, apply, fire, and refine your own glassy greens. Join us today—experiment with confidence.
5 Creative Ways to Use AMACO Celadons — Glaze Tutorial
Understanding Celadon: Color, Chemistry, and Character
Iron: the tiny color engine
What gives celadon its range of greens is iron — but in very small, precise amounts. Iron in glaze exists in two main valence states: Fe2+ (favours blue/green) and Fe3+ (favours brown/yellow). In practical terms, 0.5–2% Fe2O3 in a clear, glassy glaze will move a pale grey toward apple or deep green depending on other variables. A useful tip: make a row of test tiles with 0.5%, 1%, and 2% iron to see the jump in hue before committing to a whole batch.
The glassy matrix: silica, alumina, and fluxes
Celadon needs a clear, vitreous ground so the iron color shines through. Silica creates the glass; alumina thickens and stabilizes the melt. More silica (within reason) produces a clearer, glossier surface; more alumina helps the glaze sit without running and improves fit on clay. Fluxes (calcium, potassium, sodium, boron) change how the iron dissolves and therefore the color — calcium often deepens green, while boron can brighten transparency.
Atmosphere and thickness: the two dials we turn
Reduction firing (limited oxygen, typical in gas or wood kilns) promotes Fe2+ and the classic blue-green celadon. Oxidation (electric kilns) tends toward greyer or browner greens, though formula tweaks and thickness control can compensate. Glaze thickness matters: thin coats give pale, silvery greys; medium yields classic apple green; very thick can deepen to jewel-like greens or run. We’ll use these principles when selecting clays and recipes next.
Choosing Clay and Forms That Show the Glaze Best
Clay characteristics: porosity and iron
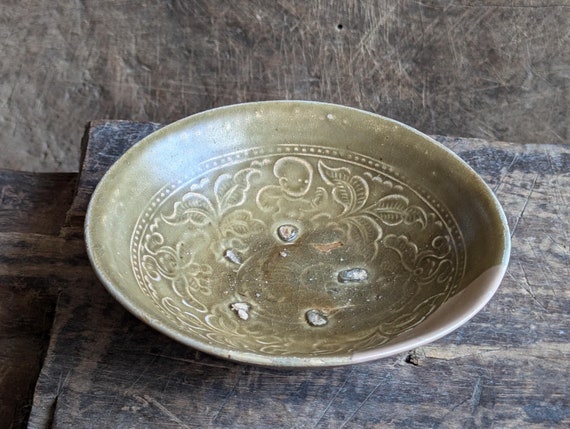
We choose clays with low-to-moderate porosity and minimal native iron so the glaze color reads clearly. High-iron clays (brown/terracotta bodies) will leach warm tones into the celadon and mute the green. In practice, a white or off-white body lets the Fe2+ in the glaze sing; a slightly specked stoneware adds character but can shift the hue toward tea-brown.
Body temperature and fit
Mid-fire (cone 5–6) to high-fire (cone 8–10) bodies are our go-to because they vitrify enough to support a glassy glaze without excessive absorption. Porcelain and high-quality stoneware tend to produce the clearest greens. If you work at lower firings, increase glaze transparency and reduce iron to avoid muddying.
Surface preparation: trimming, leather-hard finishing, and texture
Finish pieces smoothly at the leather-hard stage—tool marks and fuzzy trimming will show under transparent celadon. That said, celadon loves to pool into carved lines, stamped textures, and thrown ridges; those areas become visual anchors. We often refine rims and feet so glaze stops cleanly and prevent pinholing by compressing the surface on the wheel or with a rib.
Practical picks and studio tweaks
Look for low-iron porcelains or neutral mid-fire stonewares from reputable suppliers (Laguna, Amaco, or your local clay supplier). To adapt a clay, add a small proportion of white ball clay or porcelain to lighten color, or sieve to remove coarse grog for a smoother surface. Try 6–8 test forms: one thin-walled cup, a shallow bowl, and a carved tile to see how the glaze behaves before committing to a full run.
Next we’ll convert these choices into workable recipes and hands-on glaze mixing.
Mixing a Home-Friendly Celadon Glaze: Materials and Recipes
Core glaze components — what each does
We think of a glaze as four working parts:
Safe handling, practical shop habits
We always mask, ventilate, and avoid creating dust. Use a scale to 0.1 g, mix in a wet slurry when possible, sieve to 80–100 mesh, and store dry powders in labeled sealed bins.
Workshop-tested, home-friendly bases (parts by weight)
How to alter for thinner or greener results
Batch scaling and testing
Always scale up from a 100–500 g test batch, keep accurate records, make multiple test tiles (dipped and brushed), and iterate. Next we’ll move from mixed glaze to applying and firing strategies that coax out that glassy green.
Application Techniques: Dipping, Pouring, Brushing, and Layering
Viscosity & dip times — how the flow changes the green
We aim for a glaze that behaves like heavy cream — it should cling, level, then thinly drain. If you have tools, a Zahn cup (we like #2) giving ~20–40s is a practical target; a Brookfield viscometer (DV1) around a moderate low reading works too. Short dips yield paler, more translucent celadon; longer dips create deeper, glassy pools.
Dipping & pouring — speed, angle, and rhythm
Brushing & layering — control and effects
Brushing lets us build very thin translucent layers: use a soft synthetic or natural round (size 6–10) and apply 3–5 thin, well-dried coats for subtle celadon. For intentional depth, layer a paler base (clear-over-iron underglaze) then allow thicker pools at rims. Clear glaze over colored underglaze gives luminous depth — test first, as flow and chemistry interact.
Avoiding crawling, running, and pinholes
Clean bisque thoroughly; avoid oily hands. If crawling appears, slightly increase alumina (kaolin/bentonite) or raise viscosity. To prevent running, reduce dip time or add 1–2% CMC gum for brushing. Pinholes often mean trapped air—thin coats and slower drying help.
Foot clearance and test tiles
Always leave a 3–5 mm bare foot or use wax resist. To see differences, make a 3×4 tile sheet: rows = dip/brush/pour, columns = thin/medium/thick/clear-over-ug. Photograph each fired tile so you can reproduce the exact look on future pieces.
Firing for Green: Atmosphere, Temperature, and Kiln Strategies at Home
Target temperatures that matter
Classic celadon wants a high-fire range—typically cone 9–10 (about 1250–1300°C / 2280–2370°F). At these temperatures iron in the glaze becomes mobile and produces that deep, glassy green we chase. There are low-fire “celadon-like” glazes for cone 6, but expect a different clarity and depth.
Reduction vs. oxidation — and practical workarounds
True celadon greens are often a product of reduction (less oxygen, more Fe2+). Gas kilns give that directly. Most home electric kilns operate in oxidation, so we:
Popular home kilns: Skutt KM-818 or Paragon Caldera with a Bartlett controller—pairing a reliable controller with cone backup (Orton cones) helps reproduce results.
Sample firing schedule (starting point)
Cooling, crystal growth & crackle control
Slow cooling and intermediate holds encourage crystals and fuller color; a rapid cool can lock in paler greens. For crackle, cool faster through the 900–600°C range or use glaze formulations with a higher thermal expansion differential.
Troubleshooting, safety & kiln care
Next we’ll take these fired surfaces and explore post-fire treatments — crackle highlighting, staining, and final touches that make our celadon sing.
Finishing Effects: Crackle, Staining, and Post-Fire Treatments
Encouraging or minimizing crackle
If we want a pronounced crackle, we cool faster through the 900–600°C zone, and choose a glaze with slightly higher silica and a modestly higher thermal contraction than the body. To minimize crackle, slow the cooling, adjust the glaze toward lower contraction (more kaolin or zircon), and ensure a good glaze-body fit by testing small tiles first.
Highlighting crackle lines
We emphasize crackle by rubbing a stain or wash into the lines, then wiping the surface clean so pigment remains only in the cracks. Practical options:
Always remove excess and fire or seal appropriately for decorative versus functional use.
Iron or tea washes for depth
For subtle depth, we apply a light iron wash or a strong brewed black tea, let it settle into recesses, then gently wipe. Tea gives an entirely food-safe, low-risk antiquing effect—ideal for functional pieces where we don’t want added chemicals.
Mechanical finishing: fettling and polishing
After firing we:
Non-invasive post-fire care & safety
Gentle cleaning (soft brushes, mild detergent) is first-line. For functional ware avoid non-food-safe sealants; if we must seal decorative crackle, choose FDA-approved products and run a leach test. Avoid acetone, rough abrasives, or high-solvent finishes that can damage glaze glass.
What to avoid:
Next, we’ll put these finishes to the test and iterate in our workshop—systematic testing is where small tweaks become signature results.
Testing, Troubleshooting, and Iterating Like a Workshop
A simple, structured test plan
We make repeatable change fast by batching tests. For each firing we prepare:
Photograph tiles on a neutral card and under consistent light after each firing.
One-variable-at-a-time method
We change only one factor per tile set: iron % (±1%), glaze thickness, firing cone (e.g., cone 6 vs 6.5), or cooling rate. This isolates cause/effect and speeds learning.
Common problems, causes, and fixes
Iterate efficiently and cherish happy accidents
Batch tests, rate each tile, and keep a “favorites” folder. If a serendipitous surface pleases us and is reproducible, document it — some signature greens began as mistakes. With disciplined records and smart shortcuts (triplicate tiles, consistent photos), we build a personal celadon palette one firing at a time, ready to synthesize into finished pieces in the next section.
From First Tile to Signature Green: Our Next Steps
We’ve mapped an approachable path: choose clay and forms that show celadon well, mix and test home-friendly glazes, apply with attention, and tune firing atmosphere and temperature to coax that glassy green. Each stage is iterative; small adjustments in materials, thickness, or kiln strategy yield big shifts in tone and clarity.
Let’s stay curious, document every trial, and treat “failures” as data. Share your tiles, recipes, and questions with us so we can learn together—our best celadons will come from shared experiments and steady revisiting of the basics.


Kiln strategies at home: am I the only one sweating whenever the controller creeps up 10°F? 😂
Great section though — loved the simple steps on atmosphere control.
You’re not alone — it’s nerve-racking! Small temp bumps usually aren’t catastrophic, but watch ramp rates and soak times. And always keep a record of each firing so you can adjust next time.
Tip: place a witness cone in the kiln near your piece. You can watch the cone rather than obsessing over the controller numbers.
Short and sweet — loved the ‘From First Tile to Signature Green’ ending. Made me feel like my first tile could actually become a series.
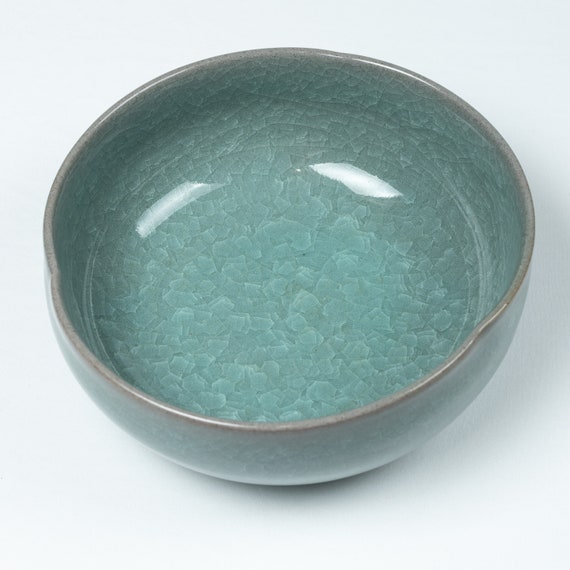
That Handmade Celadon and Brown Wavy-Edge Bowl is now inspo for my next set.
Can’t wait to see your set! The wavy edge is so good for catching glaze transitions.
That’s exactly the goal — glad it resonated, Noah! Share your first tile when you’re ready, community feedback helps heaps.
Choosing clay and forms section was my fave. I found that bulbous shapes really show off the gradient of celadon — reminds me of the Kotobuki Japanese Celadon Wheel-Thrown Bulbous Vase 4.5″ in the Etsy list.
Also, short rant: some vendors call anything “celadon” these days even when it’s just a mint glaze. Ugh.
Keep pushing for stricter recipe transparency in posts like this — tell us exactly what iron content or base you used in the demo glaze.
Love the community troubleshooting idea too — it makes iterations faster.
I second asking sellers — many are transparent if you message them. Also community swaps of test tiles can expose those ‘pretend celadons’ pretty fast.
Vendors sometimes just want the search traffic. Best bet: ask for raw recipe info or test tiles before buying if you’re picky.
Totally — we’ll include exact clay and iron content ranges in future recipes. And yes, ‘celadon’ is overused; being precise about base frits, iron oxide %, and particle counts helps reproduce results.
OMG the Handmade Celadon Bud Vase Set Trio from the Etsy list is adorable, I added it to my cart like 3 times lol 😅
Also the application techniques section was gold — I messed up pouring once and ended up with a sculpture of drips but hey, new art? 😂
Would love tips on avoiding drippy disasters when using porcelain clay though.
Also — the article’s humor made me actually read the testing section instead of skipping it. Nice job!
If you’re buying that Bud Vase Trio, consider one in a low-iron clay body to maximize celadon clarity. The seller photos might not show how different clays shift the tone.
P.S. If you’re nervous about buying, ask the Etsy seller for close-up photos of the foot and glaze thickness — many sellers are happy to share.
Pro tip: keep a small syringe or pipette on hand for controlled pouring on narrow vases. Way fewer accidental geysers 😂
Haha your drip-sculpture sounds legendary. I intentionally let a few drips in one piece and it looked like lava — in a classy way.
Thanks, Hannah! For porcelain and dripping: try thinner coats but do a quick wipe of excess at the lip, or use a 2-step approach — thin first coat, bisque low, then a slightly thicker second coat. And remember, some drips can be sanded or turned into intentional texture.
Really detailed on the chemistry — I appreciated that.
Quick Q: does anyone have recommended firing ranges (like cone numbers or °C) for the Kotobuki Japanese Celadon Wheel-Thrown Bulbous Vase 4.5″ style pieces? The article mentions atmosphere and temp but not exact ranges I feel comfortable with.
Also, what oxygen reduction steps can be realistically achieved in a small electric kiln?
I run cone packs and mark outcomes — helped me map which temps gave that soft jade look vs. the deeper emerald.
Great questions, Sophie. For celadon you often aim for cone 9–10 (about 1260–1300°C) for traditional iron-reactive celadons. In small electric kilns a full reduction is tough; try a controlled oxygen reduction at the end of firing (close vents if you have them, reduce pre-heat air) or use a subtle soda/salt reduction if your kiln and local regs allow. If you can’t do reduction, adjust the glaze recipe for a greener result in oxidation (higher iron or copper tweaks).
Also worth noting: some modern ‘electric-friendly’ celadon recipes are formulated to give green in oxidation at slightly different temperatures — check the recipe notes before assuming cone 10 is required.
I fire at cone 10 for my larger vases and get consistent celadon greens. If you’re in a smaller kiln, test tiles are your best friend — tiny changes make big color shifts.
Nice article, but I wish there were more photos comparing different clays under the same glaze.
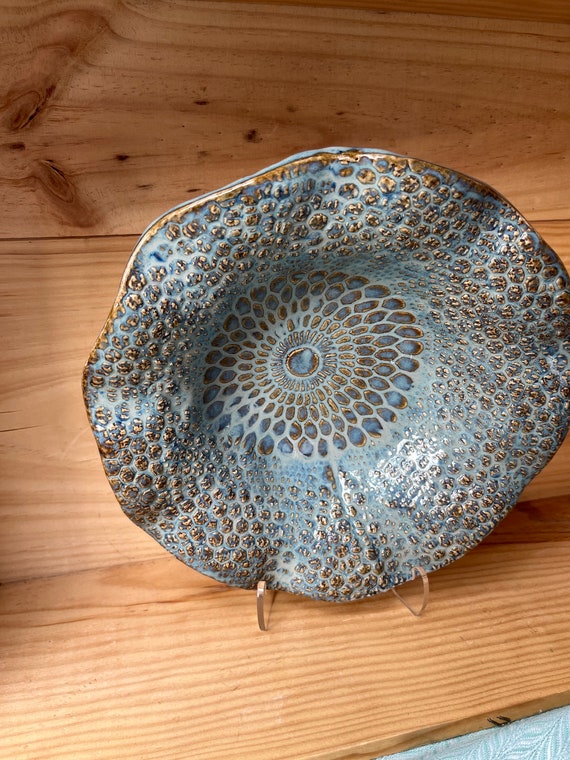
The Antique Ly Dynasty Celadon Shallow Decorative Bowl mention made me wonder how much of that antiqued look is glaze vs. post-fire treatments.
Agreed — seeing side-by-side samples of porcelain, white stoneware, and buff stoneware would be super helpful. Even a few test-tiles could show the difference.
Good point, Daniel. Antique looks often combine the glaze recipe, firing atmosphere, and post-fire staining/waxing. The ‘Finishing Effects’ section touches on staining crackle lines and gentle patinas; we’ll add a photo comparison in the next update.
Loved this workshop write-up — super practical.
I tried the home-friendly celadon glaze recipe on a small test tile and got a lovely pale green, but not quite glassy. I’m guessing I need a thinner application or a slightly higher temp.
Also, the Large Celadon Ice-Crackle Tortoiseshell Deep Bowl pictured on Etsy is exactly the kind of crackle I want to replicate — any tips on getting that tortoiseshell contrast?
Thanks for the troubleshooting section, it saved me from a lot of guesswork.
Would love a follow-up post on layering multiple celadon coats.
Agree on the thinner coat — I also wipe the foot and lower rim before firing so it doesn’t pool. For tortoiseshell, I dab on some brown underglaze into the crackles post-fire, then buff gently.
So glad it helped, Maya! For the glassy finish try: slightly thinner glaze (more water), even coverage, and a smoother bisque surface. For tortoiseshell contrast, a light iron stain wash in the crackle lines after firing can mimic that look. If you want, post a photo of your tile and we can give more specific pointers.
If it’s not getting glassy maybe try one more firing peak + hold (careful with your kiln!). Also, different clays react differently — a whiter porcelain shows celadon best.
Really appreciated the safety and testing focus. A few questions/notes:
– For home kilns, ventilation when doing any post-fire staining is crucial. Please elaborate more on safe solvents and PPE.
– The article mentions crackle staining — what stains are food-safe if the piece is intended for dinnerware (like that Large Celadon Ice-Crackle Tortoiseshell Deep Bowl)?
– Would be great to see a checklist for each stage (clay choice, glaze mix, application, firing, post-fire) — quick and printable.
Thanks!
I learned the hard way — never assume an antique look is food-safe. Some shops use antiquing materials that are not meant for plates.
For dinnerware I stick to underglazes and clear overglaze certified for food contact. No weird patinas on the inside surfaces.
Excellent points, Priya. We’ll add a safety appendix. Short answers: use non-toxic, food-safe stains/glazes for dinnerware — iron washes (post-fire) are generally fine but avoid lead/cadmium; always verify with your glaze supplier. For solvents and PPE: use nitrile gloves, respirator rated for organic vapors when using stains with solvents, and ventilate well. Checklist idea = coming soon!
Good call on ventilation — some of the staining mediums smell simple but are nasty in enclosed spaces. I run a fan and a charcoal filter when I do post-fire work.
Also adding: always do a leach test on functional ware if you plan to sell or use it for food. Better safe than sorry.
Brushing vs dipping debate: I live by brushing for control, but dipping gives that uniform glassy skin. Also — shoutout to the Handmade Celadon and Brown Wavy-Edge Bowl — the wavy edge really catches the light with celadon.
Who else prefers brush layering for subtle gradients?
Nice tips! I’ll try the base dip + brush highlight next time.
I mix — base dip, then brush highlights. Best of both worlds.
Both methods have merits. Brushing allows layering and gradients; dipping gives even thickness. For wavy edges, brushing can help avoid pooling on the ups and downs, but a quick clean-up after dipping works too.
I’m team brush. You can get painterly effects. But for big batches, dipping is a lifesaver.