Unlocking the Beauty of Imperfection: Kintsugi
Discover the ancient art of Kintsugi, where broken pottery transforms into breathtaking works of art. This technique honors the history of your ceramics, highlighting imperfections with gold powder. Join us on this journey to celebrate beauty in every crack!
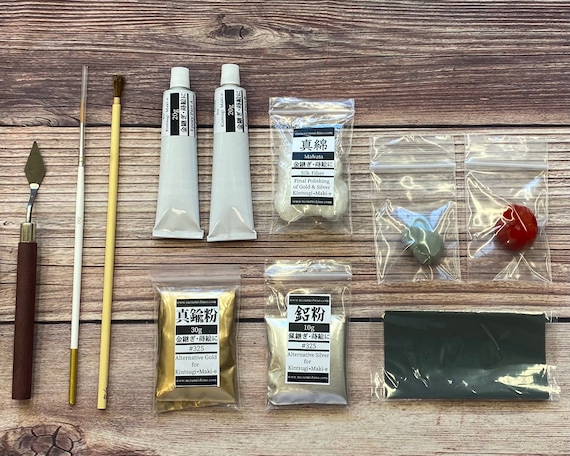
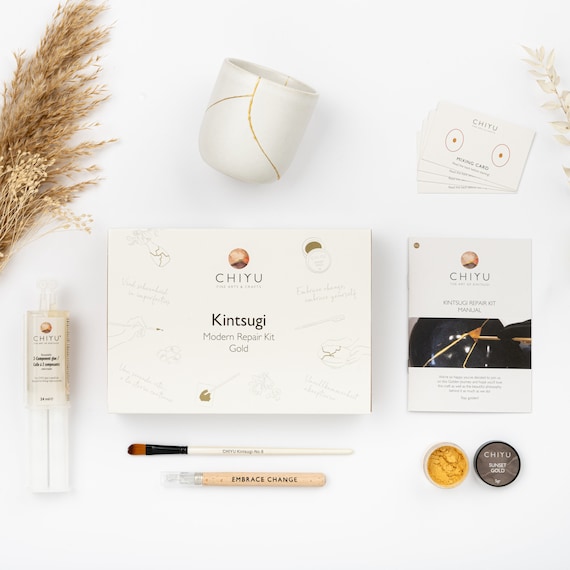
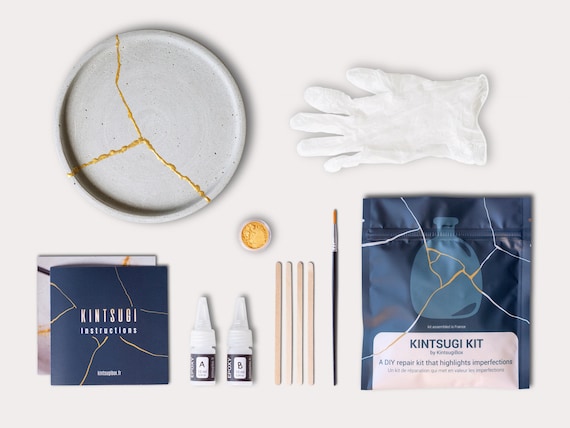
Gather Your Kintsugi Toolkit
Having these materials and tools ready will streamline your Kintsugi experience!
Transform Your Broken Bowls with Kintsugi: Embrace the Art of Gold Repair!
Step 1: Prepare Your Workspace
Why a Clean Space Makes for Flawless Results!Start by setting up a clean, well-lit workspace. This helps you focus and ensures the Kintsugi process goes smoothly. Choose a flat surface, such as a table, and cover it with a protective cloth or newspapers to catch any spills.
Ensure you have good lighting—natural light is ideal, but a bright lamp will work too. Keep your tools, such as brushes, adhesive, and gold powder, within easy reach, and ensure that your workspace is free from clutter.
For added inspiration, consider having a few images of completed Kintsugi pieces nearby. This visual motivation can spark creativity and excitement as you embark on your own project! With a well-prepared space, you can dive into the art of Kintsugi without distractions.

Step 2: Gather Your Broken Pottery
The Charm of Imperfection Awaits!Select the pieces of broken pottery you wish to repair. Kintsugi celebrates the beauty of imperfection, so look for ceramics that resonate with you. Choose items that tell a story—perhaps a cherished mug gifted by a friend or a family heirloom that was accidentally dropped.
Consider the following elements as you gather your pieces:
Once you’ve selected your pottery, you’re ready for the next step in this creative journey!
Step 3: Mix Your Adhesive
The Secret to a Strong Bond: What You Need to Know!Prepare your adhesive according to the manufacturer’s instructions. Most epoxy adhesives come in two parts: a resin and a hardener. Squeeze equal amounts of each component onto a clean mixing surface, like a disposable plate.
Mix thoroughly using a small stick or spatula until the color and consistency are uniform—this ensures a strong bond. For example, if you notice any streaks of either component, continue mixing until everything looks smooth.
Keep in mind that a well-mixed adhesive will lead to a more durable repair, so take your time. Depending on the specific product, you may have a limited working time before it begins to set, so stay focused! Once your adhesive is ready, you’re just a step away from bringing your pottery back to life!
Step 4: Assemble the Broken Pieces
Rebuilding History, One Piece at a Time!Carefully apply the mixed adhesive to the edges of your broken pottery pieces. Use a small brush or the applicator provided with your adhesive to ensure a thin, even layer.
Fit the pieces back together slowly. Use gentle pressure to encourage them to bond, aligning the cracks as perfectly as possible. This moment is crucial; the more precise the alignment, the more seamless the final restoration will appear.
For instance, when reassembling an intricate vase, take your time to match the patterns along the edges. If needed, adjust the alignment slightly until you’re satisfied with the fit before the adhesive sets.
Allow the assembly to rest undisturbed for a few minutes to secure the bond before continuing your Kintsugi journey.
Step 5: Apply the Gold Powder
Turn Your Repair into a Masterpiece!Wait for the adhesive to cure completely. Once set, grab a clean, soft paintbrush and apply another thin layer of glue directly onto the cracks. Be precise! This layer acts as the foundation for the gold powder.
Sprinkle the gold powder generously over the freshly glued areas while the adhesive is still tacky. Hold the jar or pouch at an angle to create an even distribution; this ensures the powder clings beautifully to the glue.
Tap off any excess gold powder gently, allowing it to fall away. You want just the right amount clinging to the cracks to create striking contrasts.
Think of this step as painting with gold—each crack transformed becomes a cherished story of its own, adding unique charm to your piece. Enjoy the process; the imperfections are what will make your creation shine!
Step 6: Finishing Touches and Curing
Patience Pays Off: Let the Beauty Settle!Allow the gold powder and adhesive to fully cure according to the manufacturer’s instructions. Curing times can vary, so be patient; this step is essential for a lasting finish. If you’re working with a fast-setting adhesive, this might take just a few hours, while others could require a full day.
Gently brush off any excess gold powder once the adhesive has cured. Use a soft, clean paintbrush to sweep away stray particles, revealing a polished look that enhances the beauty of your piece.
For instance, if your repaired pottery has intricate designs, this brushing method highlights both the gold and the original artistry of the piece.
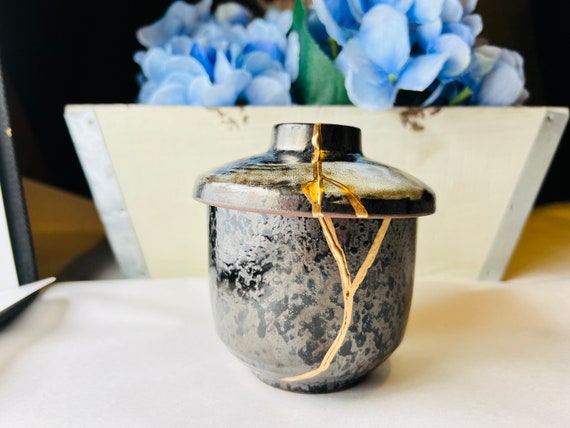
Finally, stand back and admire your Kintsugi masterpiece, where each crack tells a story of resilience and art!
Celebrate Every Flaw with Kintsugi
Now that you’ve mastered the art of Kintsugi, embrace the beauty in imperfections. Each repaired piece tells a unique story, turning the ordinary into extraordinary. How might you share your newfound appreciation for beauty in flaws with others around you?


This looks interesting, but I’m a bit skeptical. Is it really worth the hassle? 🤔 I mean, can’t I just buy a new pot instead?
I get that! But it’s way more meaningful to fix something with a story, don’t you think?
It’s definitely a personal choice, Daniel! But many find the process rewarding and a great way to cherish memories.
I’ve seen some Kintsugi pieces online and they look amazing! Can you really make something so beautiful from broken pottery?
Absolutely, Oliver! It’s all about the process and the creativity you bring to it.
Yes! It’s like turning trash into treasure! Give it a go!
Can’t believe I’ve never heard of Kintsugi before! This article is a gem! 💎 Planning to try it with my daughter this weekend, hope we make some beautiful mistakes!
Oh wow, that sounds like a blast! Perfect way to bond and create something beautiful.
What a fun weekend project! Enjoy the time together!
I’m a bit of a perfectionist, so this is a challenge for me! How do you let go and embrace the imperfections?
It’s all about mindset, Rob! Try to focus on the creativity and the story behind each piece.
Exactly! It’s liberating once you let go of the need for perfection!
I messed up the adhesive part on my first try. 😩 Is there a specific type you recommend? I used super glue but it didn’t hold the pieces well at all.
Yikes! That happened to me too. Epoxy is definitely the way to go!
Hey Tommy! For Kintsugi, it’s best to use a two-part epoxy. It holds way better for pottery.
This guide is super helpful! I had no idea where to start. Just a heads up, the gold powder can be a bit pricey, though! 😅
Totally agree! But it’s worth it for unique art!
Thanks for the tip, Annie! Look for sales or bulk options to save some cash.
Just finished my first Kintsugi piece and I’m obsessed! The gold powder looks stunning! 🌟 Thanks for the detailed steps, they really helped me get it right!
Nice! Did you use any special techniques for the gold application? I’m curious!
Congrats, Emily! Would love to see what you created!
Just a quick tip: make sure to mix the adhesive well! I didn’t and ended up with a sticky mess. 😂
Good catch, Lily! Mixing it properly is key to a good hold!
Learned that the hard way! Thanks for the heads up!
I love the idea of celebrating flaws, but can someone tell me how long the curing process takes? I’m a bit impatient! 😂
Just plan a fun project while you wait! That’s what I do!
Great question, Cathy! Curing usually takes 24 hours, but it can depend on the adhesive used.
Wow, I love the philosophy behind Kintsugi! It’s like giving your broken stuff a second chance. I can’t wait to try this with my grandma’s old vase. Just gotta find some gold powder first! 😂
So glad you’re inspired, Sarah! You can find gold powder online or at craft stores. Happy crafting!
Totally agree! There’s something special about embracing flaws. Let us know how it goes!