
Welcome to Buncheong: Clay, Culture, and Curiosity
We introduce Buncheong’s expressive stoneware tradition and will guide us gently from raw clay to finished pieces using accessible studio methods grounded in historical techniques. Our hands-on path fosters curiosity, practical skill, and respectful connection to material, process, and history.
Materials, Tools, and a Little Patience
We use stoneware clay, white slip and brushes, a throwing wheel or handbuilding tools, a stoneware kiln, trimming tools, sponges and pads, basic glazing materials; basic wheel/handbuilding experience recommended.
Mastering Korean Buncheong: A Hands-On Technique Guide
Preparing the Clay: Wedging, Conditioning, and Consistency
Want silky, predictable clay? Here’s how we turn lumps into studio-ready bodies every time.Select a suitable mid- to high-fire stoneware clay with modest iron content so our Buncheong slips and ash glazes respond predictably.
Wedge the clay thoroughly to remove air pockets and achieve uniform moisture; we use spiral or ram’s-head wedging for 3–5 minutes.
Age fresh clay for a few days to stabilize moisture or use well-conditioned reclaimed clay for consistent plasticity.
Test plasticity with a seal test—press a small disk and look for fine edge cracks—and use a rib-scratch to judge cohesion before forming.
Add 10–20% grog or fine sand when we want more body and texture for carving or bold mark-making.
Keep moisture consistent and cover work between sessions with plastic or a damp cloth.
Recycle trimmings by cutting into small pieces, soaking, sieving, and re-wedging before reuse.
Observe how the clay’s iron will later deepen slip contrast and give Buncheong its characteristic warm brown and olive accents.
Forming the Vessel: Throwing, Coiling, and Handbuilding Options
Throw? Coil? Press — which path creates authentic Buncheong spirit? We give you both traditional and studio-friendly routes.Center the clay firmly and feel it breathe under our palms—good centering makes everything easier.
Open the lump by pressing down the thumb, then pull up walls in steady, even strokes; maintain consistent pressure to avoid thin spots.
Shape the rim with a damp finger or metal rib and compress the lip so it fires cleanly; cut the foot with a wire when the pot is off the wheel.
Let the piece firm to leather-hard before trimming—usually 12–24 hours—so we can refine the foot and remove excess weight.
Build larger or sculptural forms with coils or slabs: score and slip every joint, compress seams with a wooden paddle and anvil, and smooth with a rib for a unified surface.
Use ribs and wooden paddles to create the slightly rustic, tactile Buncheong feel—drag a wooden paddle wrapped in cloth for subtle texture.
Avoid warping by keeping wall thickness even, supporting wide forms on a bat, and drying slowly under plastic.
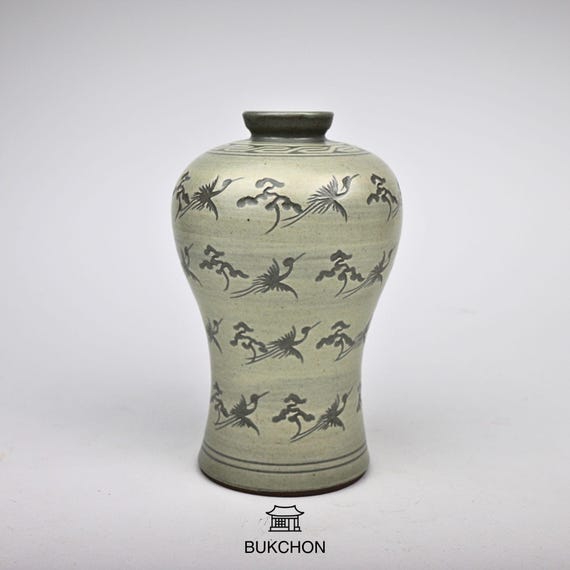
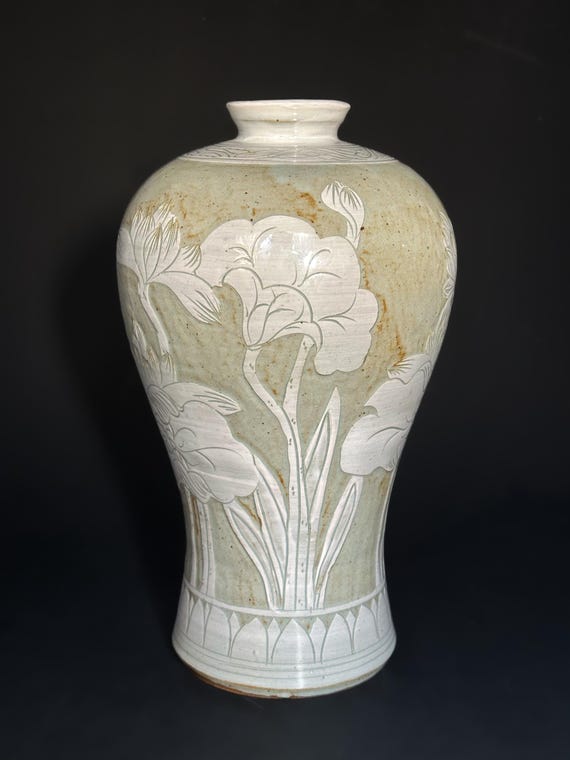
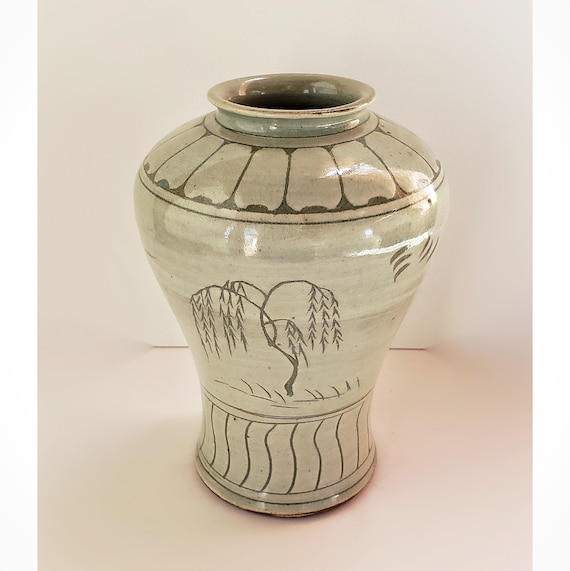
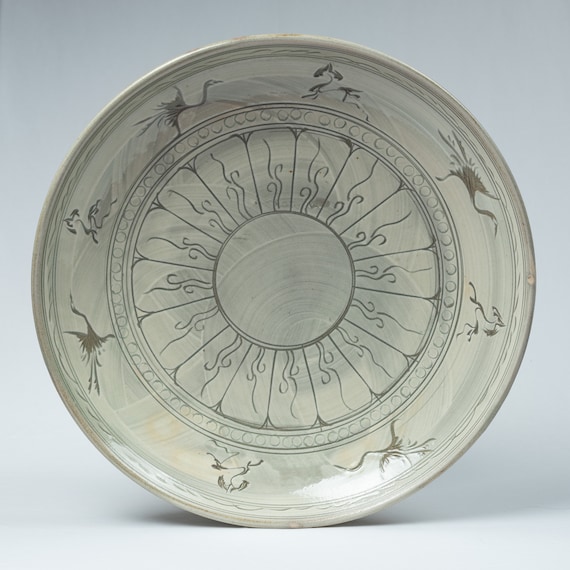
Decorative Techniques: Slip Application, Inlay, and Bold Mark-Making
Slip is our dramatic handwriting — want bold contrasts, playful scratches, or elegant inlay? Here’s how to command it.Apply a white or off-white slip as a ground layer—brush, dip, or spray depending on the scale and desired texture.
Use a brush for gestural strokes, dip for even coverage, and spray for a misted, layered look (we often spray a thin base, then brush marks on top).
Prepare slip to a cream consistency (like heavy cream) for brushing, slightly thinner for spraying. Time work at leather-hard or slightly damp stages so slip bonds without slumping. Layer thin coats, letting a light skin form between passes for opacity.
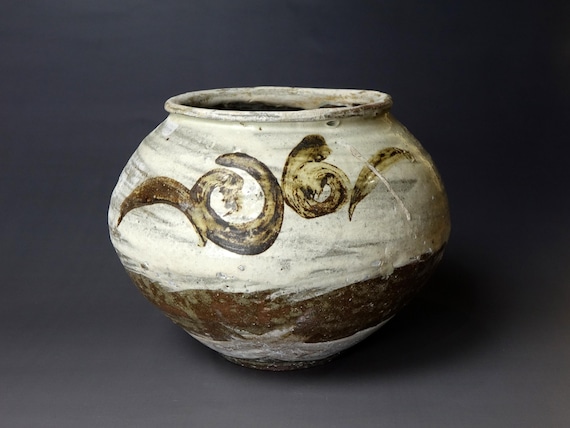
Carve sgraffito lines through the slip to reveal the body, and inlay dark slip or iron-oxide slip into incisions for contrast. Stamp with carved stamps, comb for rhythm, and make bold, spontaneous brushmarks to capture that rustic Buncheong energy.
Troubleshoot common issues:
Drying and Biscuit Firing: Careful Steps Before the Glaze
This stage sounds boring, but it’s the quiet chemistry that prevents heartbreak — dry properly and the kiln will reward us.Cover freshly decorated pieces with breathable plastic or damp cloth to slow moisture loss; we often tent tall jars for 48–72 hours and then uncover gradually. Allow slow, even drying on boards off direct sun; check and re-score or add slip to any weak joints or handles if small cracks appear.
Fire bisque with a controlled schedule suited to stoneware: ramp slowly through water-release ranges, then finish to a moderate bisque temperature.
Protect delicate slip by keeping thin slips and raised marks facing up, use kiln posts or stilts, and leave the foot unglazed. Read bisque color and porosity—light, chalky bisque = high absorption; creamier, slightly darker bisque = lower absorption—and use that cue to adjust glaze thickness. Pack the kiln with even spacing and use posts to prevent glaze sticking to shelves for safe firing.
Glaze Choices and Application: Traditional White Slip, Ash, and Iron Effects
Why our glaze choices look aged, luminous, and utterly modern — even centuries later.Choose the signature palette: an iron-rich body with white slip that lets clay show through, finished with ash or feldspathic glazes for translucent, variegated surfaces.
Thin glazes to a cream-like pouring consistency; test at least three dilutions on bisque tiles to predict flow and color.
Test tiles that include slip, decoration, and glaze together so we see how iron shows through and how ash variegates.
Brush in confident, uneven strokes for expressive marks; dip and withdraw slowly for even coverage and soft feathering.
Control drip and pooling by reducing glaze near the foot and wiping the foot clean; allow intentional runs to land where you want the visual weight.
Use iron washes (iron oxide thinned to “tea”) to rub into incised lines or coat raised texture for strong contrast.
Avoid overloading the foot and employ wax resist or stilts when needed to prevent kiln-shelf sticking.
High-Fire Glaze Firing and Post-Fire Finishing
The kiln is the final artist — can we control its moods? Mostly yes, with careful firing and finishing.Fire to a stoneware range: choose cone 8–10 (about 1260–1300°C) for classic Buncheong results. Fire in reduction for rich, mottled iron effects; fire in oxidation for warmer, restrained iron tones.
Ramp and hold to develop the glaze:
Control cooling to tune surface: cool slowly through 1000–600°C in reduction to encourage iron migration and spotting; cool faster for crisper marks. Expect ash to melt into glassy runs; expect iron to pull into freckles or streaks where it meets ash.
Mix alternatives for oxidizing studios: add 1–3% iron oxide to glazes or apply iron washes and controlled ash-sprinkles before firing.
Clean and finish carefully: grind or sand the foot (320–600 grit wet), remove dust, and use certified food-safe glazes or approved sealing for functional ware.
Document every kiln: photograph pieces, note atmosphere, temperature curve, and glaze recipes; iterate with test tiles.
From Mud to Museum-Worthy Buncheong
We’ve traced clay to kiln, showing wedging, forming, decorating, drying, and high‑fire finishes; Buncheong rewards bold marks, respectful technique, and iterative testing. Try it, experiment freely, then share your pieces so we can celebrate, learn, and grow more.


Loved the cultural context in the intro — really set the vibe. I tried the wedging steps this weekend and my clay still had air bubbles. 😩
Any tips for spotting tiny bubbles before throwing?
Also, the drying section warned about cracks but didn’t say how long to wait for the bisque — is it strictly weather-dependent?
Thanks for such a thorough guide, overall super helpful!
If you’re firing in a kiln at a community studio, they sometimes accept slightly damp bisque but it’s risky. I always err on the side of too dry.
Great question, Sarah — tiny bubbles often hide in the middle of a lump. Try cutting the clay into slabs after wedging to visually inspect the cross-section. For drying, a good rule is ‘slow and even’: cover with plastic and let it dry over several days to a week depending on thickness and humidity. If you have a moisture meter, aim for near bone-dry. 🙂
Yup — slab-checking is golden. Also, try a few extra minutes of wedging with a firm cone motion to force them out.
A few questions from a novice:
– When you talk about ‘inlay’, is that always done with contrasting clay slips or can underglaze pencils work?
– Any advice on packaging finished pieces for shipping? I’m thinking of sending some to family.
Also — love the ‘From Mud to Museum-Worthy’ header. Made me feel dramatic and important. 😂
Also put a layer of cardboard between pieces if sending multiples, and avoid stacking plates unless separated with foam.
And if shipping glazed work, ensure the glaze is fully cured and the piece isn’t just bisque — sudden temperature changes can cause stress cracks in transit.
Great questions. Inlay traditionally uses contrasting slips, but underglaze pencils can work for fine lines on leather-hard clay — test first. For shipping, wrap each piece in bubble wrap, use kraft paper to fill voids, and double-box fragile items. Add “Fragile” labels and consider insurance for valuables.
Haha I tried the bold mark-making and my first attempt looked like a toddler’s scribble — but then the ash glaze did something unexpectedly beautiful and now I kind of love it.
This guide made me more experimental and less precious about ‘perfect’ forms. Thank you! 😊
That’s exactly the spirit of Buncheong — spontaneity and bold marks are part of the aesthetic. Glad it encouraged you to embrace happy surprises!
This guide is thorough, but I felt a few practical shortcuts could’ve been mentioned for hobbyists who don’t have a full studio.
Like:
– Alternative ways to wedge without a big table
– Budget-friendly tools for inlay
– What to do if you don’t have a kiln (raku? community studios?)
Would love a ‘starter kit’ add-on.
Community college ceramics classes are a great way to get kiln time and instruction without investing big up front.
Secondhand shops and local art centers often have cheap ribs and wooden tools. Check Facebook Marketplace — I found a bag of tools for $15.
Great suggestion — a ‘starter kit’ appendix is a good idea. For wedging, a sturdy countertop or plywood on sawhorses works fine; use a rubber mat to protect surfaces. For kilns, community studios and some pottery shops offer firing services; raku is an option but not the same finish as Buncheong. We’ll consider adding a budget tools list.
Thanks for these community tips, everyone. I’ll compile them into a compact ‘starter resources’ section for the guide.
Short and sweet: the glossary of terms at the end helped when I didn’t know what ‘plasticity’ vs ‘leather-hard’ meant. One tiny nitpick — a couple of terminologies were used before they were defined, which tripped me up while reading front-to-back. Otherwise 👍
Okay, confession: I tried to do a traditional iron-effect glaze and ended up with a brown blob. 😂
I followed the measurements but maybe my kiln ramp was off? The guide’s firing schedule is helpful but my kiln is old and temperamental.
Questions:
1) Is there a safe way to test-fire a small piece to dial in the iron effects?
2) Any way to ‘rescue’ a piece with too-much-iron bloom without refiring to collapse it completely?
Would love step-by-step troubleshooting!
Test tile tip is everything. I label mine with cones and kiln shelf position. Saves a lot of heartbreak.
One more thing — iron behaves differently with different atmospheres. If you can control reduction vs oxidation, that will change the results drastically. If not possible, adjust the recipe instead of relying on atmosphere control.
Sometimes layering a different slip before refiring changes how iron behaves — experiment on a tile first!
Thanks for the honesty, Olivia — happens to many of us. 1) Absolutely: make a small test tile (2×2 inches) from the same clay and slip/glaze profile and fire it before risking a larger piece. 2) If the iron bloom is heavy, sometimes a light sanding and reapplication of a clearer slip followed by another controlled firing helps, but that can be hit-or-miss. Test tiles are your friend.
Old kilns are the worst. If you can, place cones next to the tile to read real temp vs controller — might explain the blob.
I appreciate the section on ash glazes. The history part was lovely, too.
Two things I tried that might help others:
– Sift your ash well (tiny grit will ruin the smoothness)
– Pre-wet and let sit for 24 hrs before mixing — it mellows out the wildness
Not perfect every time, but fewer surprises 😊
Pre-wetting is a game-changer. I also decant the clearer liquid to avoid too much organic residue.
Excellent tips, Emma — those small steps make a big difference. Sifting and settling ash reduces specking and can help predict the final texture.
Nice guide. Quick note: the coiling photos made it look easy, but joining coils was my biggest struggle. Cracked seams every time.
Cracking at seams is usually a moisture mismatch — make sure the inner coil is leather-hard and the outer coil is slightly softer so they mesh. Score-and-slip both surfaces well and compress with a rib to eliminate air and create a strong join.
Minor critique: the firing schedules are great but felt a bit jargon-heavy for absolute beginners. Maybe a simple ‘if this happens, do this’ troubleshooting list would help — e.g., bubble/glaze crawl/peeling, pinholes, blistering, crazing.
Anyway, super informative. Will be my go-to when I try Buncheong next month.
Thank you — a troubleshooting checklist is a fantastic idea. We’ll add common glaze faults with causes and fixes in a compact table in the next update.
Yes please — I keep Googling symptoms and getting 12 different answers. A single-source list would save time.
The inlay section blew my mind — simple tools and such bold effects. I wish there were more close-up photos of the mark-making strokes, though. A short vid would be epic.