Why We Glaze with Confidence: Lead-Free, Food-Safe Foundations
We choose lead-free, food-safe glazes because health and legal responsibilities matter. Using safe glazes protects users from toxic exposure and keeps our work sellable and compliant. In this guide we give practical recipes, help you pick materials, and show simple testing and care so your tableware is beautiful and safe.
By the end you’ll confidently mix and apply reliable glazes, fire them correctly, and verify food safety with basic tests. We focus on hands-on steps, clear labels, and troubleshooting so you can make attractive, durable dishes without compromising health or standards.
We write this for studio potters, hobbyists, and small businesses who want dependable, easy-to-follow methods and clear safety practices every step.
Easy Powdered Sugar Glaze: Quick and Perfect every Time
1
Lead and Food Safety: The Fundamentals Every Maker Should Know
How lead moves from glaze to food
Lead and other heavy metals can migrate out of a glaze and into food or drink through leaching. Acids (vinegar, tomato sauce, citrus), long contact times, and heat (hot coffee) all increase leaching. We’ve seen a midday studio test where a lemon-soaked saucer produced measurable metal release after just 24 hours — a simple reminder that surface chemistry matters as much as appearance.
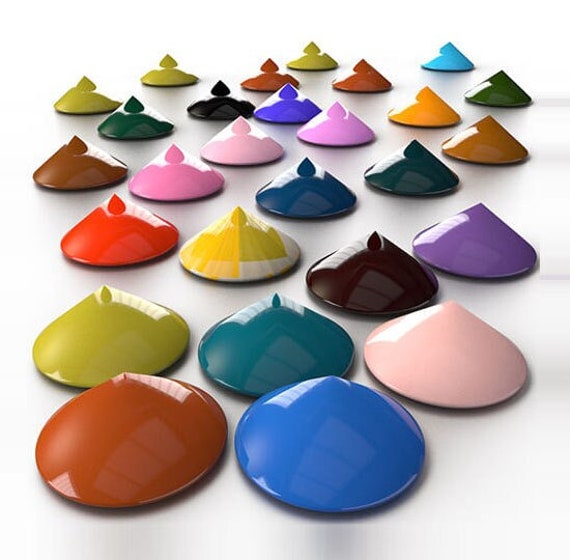
Food-Safe Choice
Degussa Food-Safe Ceramic Color Glaze Powder and Liquid
Lead-free glazes for earthenware, multiple application forms
We offer Degussa earthenware glazes that are lead-free and come as powder to mix or ready-to-use liquid, firing between 980–1080°C for reliable results. They’re ideal when you need safe, vibrant color on food-contact ceramics.
Lead-free: often require correct firing ranges and recipe balance to achieve similar gloss and color safely.
Why small exposures matter
There is no truly “safe” blood lead level — lead accumulates and affects nervous, reproductive, and developmental systems, especially in children and pregnant people. Even occasional use of a contaminated mug can add up over time. We treat this as a cumulative-risk problem, not a one-off.
Firing temperature and glaze fit: the safety levers we control
Fire to the manufacturer’s recommended cone; underfiring can leave unstable, soluble phases.
Glaze fit matters: crazing (tension cracks) increases surface area and liquid penetration, raising leach risk.
Overfiring can run or crystallize pigments, sometimes exposing metallic phases that leach.
Our studio responsibilities
Vet suppliers and request MSDS or conformity statements.
Keep leaded and lead-free materials strictly separated.
Label functional ware clearly, test glazes (simple acetic-acid soak or lab analysis), and communicate safety to customers.
Next we’ll dig into choosing safe materials and reading labels so your next recipe starts with the right ingredients.
2
Materials, Ingredients, and Labels: Choosing Safe Components
The roles: silica, fluxes, alumina, boron — how they interact
We start by thinking of a glaze like a recipe:
Silica provides glass and hardness.
Fluxes (zinc, lithium, sodium, potassium, boron-containing frits) lower melting temperature and control gloss.
Alumina (from clay or added alumina hydrate) gives viscosity, suspension, and durability.
Boron (often supplied by frits or borates) helps melt at mid-to-low temps and can replace lead in low-fire systems.
Together they determine melt behavior, solubility, and compatibility with the clay body. In practice, swapping a flux changes melting and leachability — so substitutions must be balanced, not random.
Colorants and commercial stains: what usually works for functional ware
Many commercial ceramic stains (Mason, Mayco, Ferro/Megastone ranges) are manufactured to be stable and lead-free; iron, cobalt, copper, and nickel oxides often behave predictably when properly melted. We recommend:
Request technical data sheets (TDS) showing composition and firing range.
Example: when a favorite mid-fire blue contained cadmium, swapping to a cobalt-based stain kept color and improved safety — test visually and chemically.
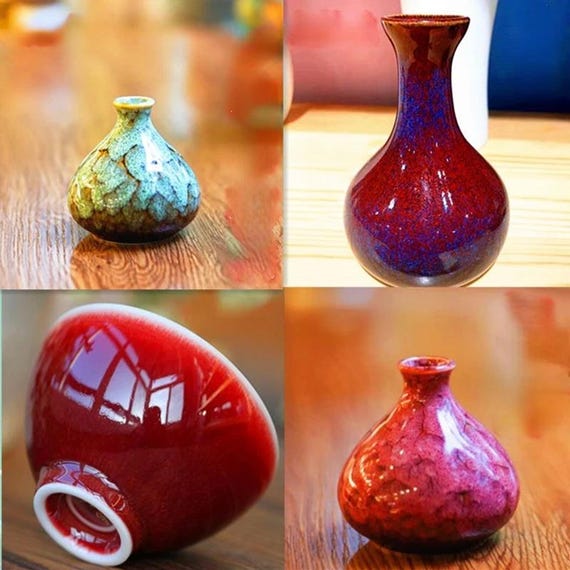
Durable, eco-friendly glaze for hand-painted ceramics
We provide this 300ml medium-temperature mineral glaze to give smooth, durable color while remaining lead-free and environmentally safe. It’s perfect for DIY vases and hand-painted porcelain when you want bright, long-lasting finishes.
Look for CAS numbers and explicit ingredients (e.g., “lead oxide,” “cadmium sulfide,” “barium carbonate”). Key steps:
Read MSDS/TDS: check declared heavy metals and recommended firing range.
Don’t trust “non-toxic” alone; ask suppliers for leach-test reports or certificates of conformity.
If a supplier claims “food-safe,” request the specific test method and lab report.
Ingredients to avoid or verify
Avoid obvious red flags: lead (PbO, litharge), cadmium, soluble barium, and some chrome VI compounds.
Verify less obvious items (some glazes use zinc or high lithium — fine if tested).
Sourcing strategies and practical substitutions
Work with reputable ceramic suppliers and ask for documentation.
If a frit or stain is unavailable, choose one with similar flux/alumina/boron balance and run small test tiles.
Keep a substitution log: batch, firing, and test results to build reliable alternatives.
Next we’ll apply these choices in practice — glazing, drying, and firing for consistent, safe results.
3
Our Go-To Lead-Free Recipes: Reliable Bases for Everyday Use
We present four versatile, tested lead-free bases that cover most functional ware needs. Each is tuned for predictable fit, food-safe potential when properly fired and tested, and easy customization with underglazes or stains.
Clear Glossy — the everyday workhorse
A bright, fully transparent gloss for showing clay texture and underglaze work.
Firing range: cone 6 (mid-fire) to cone 10 (high-fire) depending on variant.
Application: 2 medium-dipped coats or two brushed coats ≈ 0.6–1.0 mm wet.
Behavior: shows underglaze crispness; does not obscure brushwork.
Safe colorants: low-load iron or cobalt stains; commercial lead-free stains.
Variation: brushable thicker version for deep gloss on decorative pieces; slow-maturing high-fire recipe for cone 10 that resists running.
Translucent Satin — soft sheen, forgiving surface
A slightly opacified, satin finish that masks small surface flaws.
Firing range: cone 5–6.
Expected finish: soft, semi-translucent satin.
Clay pairings: mid-fire stonewares.
Application: 1–2 dipped coats ≈ 0.5–0.9 mm.
Behavior: blends underglaze edges; great for layered slips.
Safe colorants: titanium-stabilized stains, small iron additions for warmth.
Variation: reduce zinc for a more matte hand or add a touch of glossy frit for more sheen.
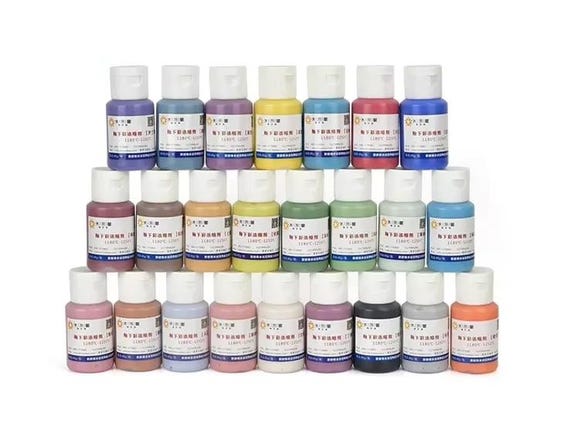
Best for Beginners
12-Piece Lead-Free Ceramic Underglaze Color Set for Students
Non-toxic pigments designed for students and children
We created this 12-piece underglaze set with lead-free, non-toxic pigments so students and children can safely enjoy pottery painting. The concentrated colors are easy to apply and brighten ceramic projects for learning and play.
Variation: slightly lower maturation for brush-on mug interiors; slower cool for crystal effects.
4
Application, Drying, and Firing: Techniques for Consistent, Safe Glazes
Application methods: brush, dip, spray
We choose the method that matches the piece and the recipe. Brushing: use long, even strokes and thin coats to avoid drips; two medium coats usually beats one heavy coat. Dipping: hold steady, drain vertically for 5–15 seconds, and avoid wiping rim edges until leather-hard. Spraying: an HVLP gun (for example, Fuji Semi-Pro 2) or an airbrush (Iwata Eclipse for small pieces) gives the most even coverage—practice spray passes 6–8″ away in overlapping strokes.
Measuring and targeting glaze thickness
We aim for 0.5–1.2 mm wet thickness depending on recipe (see earlier recipe notes). Practical ways to measure:
Wet film thickness gauge (FTG) for repeatability.
Draw-down bars for lab-like consistency.
Simple rule: 1 medium dip ≈ 0.5–0.8 mm; two medium dips ≈ 0.9–1.2 mm—verify on test tiles.
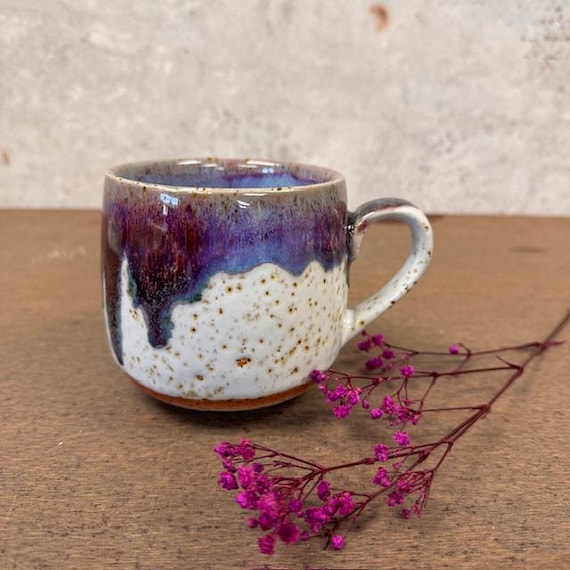
Must-Have
Japanese-Style Handmade Black Stoneware Espresso and Tea Cup
Minimalist small cup ideal for espresso and tea
We craft this small speckled stoneware cup in a Japanese minimalist style that’s great for espresso, tea, or small servings. Its handmade glaze makes each piece unique and ready to gift.
Let pieces dry in a dust-free, draft-free area. Common problems:
Pinholes: caused by trapped air or rapid firing—use thinner coats, slow bisque burnout, and a short top soak to release gases.
Crawling: often from oily or dusty surfaces—clean bisque ware, use light scumble or wash for greasy clays, and apply thinner coats.
Firing schedules and frit maturation
We use moderate ramps: 150–300°C/hour through low temps, slowing around 300–500°C to allow organic burnout. At top temperature, a short soak (10–20 minutes) helps frits flow and bubbles collapse; for heavily fluxed mid-range glazes, a slightly longer soak reduces pinholing. Avoid extremely fast firing through the glaze melting window—this risks running or under-maturation.
Glaze fit and practical adjustments
For crazing, test bars are gold: try cooler firing, add silica to the glaze, or use a body with higher thermal expansion. For shivering, reduce flux or increase silica/sink expansion in the clay. Always keep small test tiles labelled and record temperature, ramp, and soak.
Studio safety and kiln loading
We handle powders with a P100 respirator, use sealed mixing bins, and dedicate brushes/tools to food-safe glazes. Load so glaze never touches shelves—use stilts or kiln wash—and separate lead-free work from older materials to prevent cross-contamination.
5
Testing and Troubleshooting: Verifying Food Safety and Fixing Problems
We want makers to be sure—pragmatic, tiered steps keep risk low and confidence high. Start with fast studio checks, then add consumer kits, and reserve accredited lab leach testing for final verification.
Simple in‑studio checks (quick, but limited)
Visual inspection: look for pinholes, pinprick bubbles, or matte, underfired areas where glaze might not seal. These are red flags but not proof of contamination.
Water immersion: fill a glazed bowl with warm water for 24 hours, then sniff and look for obvious discoloration. This only detects the worst failures—many soluble metals won’t show.
pH anecdotes: vinegar or lemon tests are unreliable—acid can attack many glazes unpredictably and give false reassurance.
Consumer lead test kits (use carefully)
We use 3M LeadCheck Swabs for quick surface screening; they’re handy for suspect old glaze or incoming wares.
Caveats: kits are surface-only, have variable sensitivity, can be affected by glaze color/finish, and can give false negatives. Always follow instructions and check expiration.
When to buy accredited lab leach testing
Invest in a lab (ICP‑OES/ICP‑MS leach methods) when you launch a product line, change raw materials, or a kit flags an issue. Ask labs for the method, detection limits, and results for lead, cadmium, and any metals you’re concerned about. Expect $100–$400 per test depending on scope.
Troubleshooting common glaze defects that affect safety
Pinholes/blistering: cause—gas release or too‑viscous glaze. Fix—thinner coats, slower bisque burnout, small top soak.
Crawling: cause—contaminants or too‑thick slip. Fix—clean bisque, reduce oil, apply thinner coats, lightly scumble if needed.
Crazing: cause—glaze too tight. Fix—cooler firing, add silica or reduce flux, test adjusted fit on bars.
Poor fit/shivering: cause—glaze contraction mismatch. Fix—reduce flux, increase thermal expansion in body or glaze.
Interpreting marginal lab results
If values approach regulatory limits, quarantine the line, repeat tests (different lab/sample), trace raw materials, and reformulate or relabel for non‑food use until results clear. We document everything and communicate transparently to customers.
Next we’ll take these verified, safe glazes into everyday use—care, labeling, and how to explain safety to buyers.
6
Everyday Use, Care, and Communicating Safety to Customers
Practical care recommendations
We encourage straightforward, honest guidance so pieces stay beautiful and safe. When in doubt, recommend gentle care.
Hand wash recommended for most handmade glazes; use mild detergent and a soft sponge.
Dishwasher-safe only if you’ve validated the glaze (include cycle advice: avoid high‑heat sanitize cycles; Bosch 800 Series or Miele gentle cycles are less aggressive).
Microwave use: allow only fully tested, non‑metallic glazes; never microwave metallic lusters or rims.
Handling acidic foods and heat
Acids (vinegar, tomatoes, citrus) can stress some glazes over time. We advise:
“Not for prolonged contact with acidic foods” when a glaze shows marginal resistance.
For tested glazes, note safe use: “Safe for everyday acidic foods; avoid overnight soaking in highly acidic solutions.”
When to retire a piece
Look for safety‑related damage and act early.
Retire pieces with chips exposing raw clay, deep cracks, heavy crazing, or flaking glaze.
If a customer reports staining that won’t clean, ask for photos and batch number; err on the side of replacement.
Labels, online descriptions, and copy examples
Clear, concise language builds trust.
On tags: “Hand wash recommended. Microwave safe (no metallics).”
Online: include recipe batch code, test date, and a one‑sentence explanation of testing methods (e.g., “Lab-tested for lead & cadmium, ICP‑MS; certificate available”).
Warranty, records, and handling customer inquiries
A simple, fair policy protects everyone.
Warranty sample: “We warrant this item for food‑safety issues related to glaze leaching when used as directed. Contact us within 30 days with images and batch code; we will replace or refund.”
Keep a log: recipe batch number, raw material lot, kiln run (curve & date), lab certificates, and photos—retain for 3–5 years.
Customer script: “Thank you — please send a photo and the bottom stamp. We’ll review our batch records and respond within 3 business days; if there’s a safety concern, we’ll replace or refund.”
With these practical steps, we keep customers safe and confident as we move into the article’s closing thoughts.
Confident, Safe, and Beautiful: Bringing Lead-Free Glazes into Everyday Life
We reaffirm that with thoughtful material choices, tested recipes, careful application, and proper testing, we can confidently produce attractive, durable, lead-free tableware for everyday use. Next steps: pick a reliable base recipe from this article, do a few practice firings to dial in fit and surface, run or commission a basic leach test before selling functional ware, and document firing schedules and results so you can reproduce safe outcomes.
Let’s keep learning: iterate, share findings with the community, and adopt studio practices that protect users and our process. By combining curiosity with rigour, we make work that’s beautiful, safe, and trusted—one glaze at a time. Join us in glazing wisely.
I run a small Etsy shop selling espresso cups inspired by those Japanese-style pieces. I switched to the lead-free recipes here last year and the shoppers didn’t notice a difference in feel — only peace of mind. I make a little card for each cup that says which glazes were used (e.g., ‘Degussa Powder + 300ml Clear, lead-free tested’). It reduces questions and gives my listings a professional touch.
Also — do the standard home leach tests cover acidic foods like lemon? The article mentions simulating, but any personal protocols welcomed.
Love the card idea, Luke — excellent customer communication. For acidic foods, a simple test is 4% acetic acid (household vinegar diluted) in contact for 24 hours on a glaze tile, then send to a lab for analysis if you need a cert. The article gives a DIY screening method and when to escalate to lab testing.
Would love a template of your info card, Luke — that sounds like a great listing addition.
If you ever do lab tests, post the cert in your shop — big trust builder.
I used lemon and vinegar for a quick screen — it’s not lab-grade but catches the worst offenders before you sell anything.
Nice read. I’m skeptical about the ‘lead-free’ label sometimes — the Materials section helped clarify what to look for on labels. Still, wish there were more pics of test results vs bad glazes.
Totally fair. We’ll add a gallery of before/after test tiles in a future update. In the meantime, check the Etsy listings (some sellers include test shots) and always ask for a lab cert if in doubt.
Agree — pictures help. Also the article’s step-by-step for the acid leach test is very useful even without lab certs.
Okay, nitpick: the piece about lead fundamentals was solid but a few of the terms could use a tiny glossary. I had to google ‘soluble lead’ quickly. Otherwise, great job 👍
Seconded — glossary pls. Saved me from another midnight Google rabbit hole 😉
I actually liked the technical bits — but a glossary would make it accessible to more people, agreed.
Good call, Mia. We’ll add a small glossary for terms like soluble lead, leach testing, and cone equivalents in the next edit.
This article made me LOL and then actually glaze something. The humor in the ‘Confident, Safe, and Beautiful’ section made the technical stuff less scary. Also tiny rant: some product listings on Etsy don’t state food safety clearly — like, be bold and say it! 😂
We hear you, Sophia. Clear labeling helps everyone. The article encourages makers to be explicit about safety testing and the exact glazes used.
Yup — ‘food-safe’ without backing is vague. Better to say ‘lead-free, tested per X method’ if you can.
Love this guide — super practical. I especially liked the Testing and Troubleshooting section. I tried the Degussa Food-Safe Ceramic Color Glaze Powder last month and it behaved well in a cone 6 firing.
Quick question: does anyone mix the Degussa liquid with the 300ml medium-temp glaze to tone down the vibrancy without losing safety? I’m paranoid about leaching even though the article explains testing well.
Great question, Emma. You can mix them, but do a small test tile and run a leach test (acidic food sim) before committing. The article’s testing section walks through the simple steps — always confirm each new mix.
I’ve done that mix — it mutes the color nicely. Just keep an eye on viscosity and don’t add too much liquid glaze, otherwise it runs.
Thanks for the heads up! I was about to try mixing them. Did you notice any crazing?
Tried the 12-Piece Lead-Free Ceramic Underglaze Color Set for Students with my class. Bright, easy to use, and no smell — perfect for workshops. The ‘Everyday Use, Care’ section is exactly what parents asked for when I sold pieces at a school show.
Fantastic to hear it performed well in a classroom environment. The article’s care instructions are written with exactly that kind of real-world use in mind.
Teaching tip: have students label their test tiles on the bottom — saves confusion when everyone’s tiles look similar.
Honest opinion: I’m still uneasy about switching suppliers. The article lists a few Etsy items, which is helpful, but does anyone recommend a consistent brand for long-term production? Looking for reliability
(not scared, just cautious lol).
If you want names: Degussa has been pretty consistent for me, especially the powdered color glazes.
Totally fair. For small-scale shops, consistency matters. Try buying a larger batch from one trusted seller and running a few weeks of tests before switching. Also, reading seller reviews and asking about batch consistency helps.
I stuck with the same 300ml medium-temp glaze for 2 years and it made production much smoother. Little variations still happen but predictability helps a lot.
Okay, full disclosure: I burned my first batch because I misread the firing schedule (duh). This article would’ve saved me a ton of anxiety. The Application and Firing tips are gold.
Question: anyone using the Japanese-Style Handmade Black Stoneware Espresso and Tea Cup as inspiration for shape and then using the 12-Piece Underglaze set for accents? Any tips on layering underglaze under a clear lead-free glaze?
Funny story: I once used too many underglaze layers and ended up with ‘mud painting’ effect — not in a good way 😂
Yep I do! Underglazes stick well under clear lead-free glazes. Important bit: make sure underglaze is totally dry and bisqued properly. Test for pinholes after glaze.
Good tips, Luke. Aisha — also avoid very thick underglaze layers; they can cause crawling. Do a small sample cup with the same clay body to verify results.
I appreciated the Materials, Ingredients, and Labels section the most. Quick tip for beginners: keep a spreadsheet of test tiles — date, recipe, firing schedule, and a small photo. Makes troubleshooting waaay easier.
Excellent suggestion, Sarah. That ties right into the Testing and Troubleshooting section — record-keeping is underrated.
Spreadsheet fanatic here too — color swatches + hex codes for underglazes saved my life when making sets for clients.
Super informative article. I appreciated the section on communicating safety to customers — short, clear statements helped my shop policy look professional. I now mention specific products like the ‘300ml Medium-Temperature Lead-Free Pottery Glaze’ in listings which customers love.
Do you link to the product pages or just name them? I worry about linking to third-party sellers causing confusion.
Awesome to hear, Claire. Transparency builds trust — listing the glaze and a short note on testing helps avoid questions at checkout.
I liked the troubleshooting flowchart idea in the article. Saved me from overreacting when my rims developed tiny pinholes — turned out to be application thickness, not the glaze formula.
Pro tip: clean your kiln shelves more often. 🙂
Cleaning shelves also prevents ash contamination. Learned that the hard way when a firing got speckled.
Yes! Pinholes are often application-related. And kiln maintenance is a huge factor in consistent results — good reminder.
Short and sweet: the recipes worked for me on stoneware at cone 6. No disasters, low odour, and my Turkish cup prototypes (similar to the Handmade Black Stoneware Espresso and Turkish Cup listing) look great.
Also: anyone else pronounce ‘glaze’ like ‘glayz’ in their head? lol
Did you use the 300ml glaze or mix from powder?
LOL yes! Also props for testing on those small cups first — saves clay and time.
Love that image — ‘glayz’ — made my morning. Glad the recipes translated well to your workflow, Ben.


This is long but I hope helpful:
I run a small Etsy shop selling espresso cups inspired by those Japanese-style pieces. I switched to the lead-free recipes here last year and the shoppers didn’t notice a difference in feel — only peace of mind. I make a little card for each cup that says which glazes were used (e.g., ‘Degussa Powder + 300ml Clear, lead-free tested’). It reduces questions and gives my listings a professional touch.
Also — do the standard home leach tests cover acidic foods like lemon? The article mentions simulating, but any personal protocols welcomed.
Love the card idea, Luke — excellent customer communication. For acidic foods, a simple test is 4% acetic acid (household vinegar diluted) in contact for 24 hours on a glaze tile, then send to a lab for analysis if you need a cert. The article gives a DIY screening method and when to escalate to lab testing.
Would love a template of your info card, Luke — that sounds like a great listing addition.
If you ever do lab tests, post the cert in your shop — big trust builder.
I used lemon and vinegar for a quick screen — it’s not lab-grade but catches the worst offenders before you sell anything.
Nice read. I’m skeptical about the ‘lead-free’ label sometimes — the Materials section helped clarify what to look for on labels. Still, wish there were more pics of test results vs bad glazes.
Totally fair. We’ll add a gallery of before/after test tiles in a future update. In the meantime, check the Etsy listings (some sellers include test shots) and always ask for a lab cert if in doubt.
Agree — pictures help. Also the article’s step-by-step for the acid leach test is very useful even without lab certs.
Okay, nitpick: the piece about lead fundamentals was solid but a few of the terms could use a tiny glossary. I had to google ‘soluble lead’ quickly. Otherwise, great job 👍
Seconded — glossary pls. Saved me from another midnight Google rabbit hole 😉
I actually liked the technical bits — but a glossary would make it accessible to more people, agreed.
Good call, Mia. We’ll add a small glossary for terms like soluble lead, leach testing, and cone equivalents in the next edit.
This article made me LOL and then actually glaze something. The humor in the ‘Confident, Safe, and Beautiful’ section made the technical stuff less scary. Also tiny rant: some product listings on Etsy don’t state food safety clearly — like, be bold and say it! 😂
We hear you, Sophia. Clear labeling helps everyone. The article encourages makers to be explicit about safety testing and the exact glazes used.
Yup — ‘food-safe’ without backing is vague. Better to say ‘lead-free, tested per X method’ if you can.
Love this guide — super practical. I especially liked the Testing and Troubleshooting section. I tried the Degussa Food-Safe Ceramic Color Glaze Powder last month and it behaved well in a cone 6 firing.
Quick question: does anyone mix the Degussa liquid with the 300ml medium-temp glaze to tone down the vibrancy without losing safety? I’m paranoid about leaching even though the article explains testing well.
Great question, Emma. You can mix them, but do a small test tile and run a leach test (acidic food sim) before committing. The article’s testing section walks through the simple steps — always confirm each new mix.
I’ve done that mix — it mutes the color nicely. Just keep an eye on viscosity and don’t add too much liquid glaze, otherwise it runs.
Thanks for the heads up! I was about to try mixing them. Did you notice any crazing?
Tried the 12-Piece Lead-Free Ceramic Underglaze Color Set for Students with my class. Bright, easy to use, and no smell — perfect for workshops. The ‘Everyday Use, Care’ section is exactly what parents asked for when I sold pieces at a school show.
Fantastic to hear it performed well in a classroom environment. The article’s care instructions are written with exactly that kind of real-world use in mind.
Teaching tip: have students label their test tiles on the bottom — saves confusion when everyone’s tiles look similar.
Honest opinion: I’m still uneasy about switching suppliers. The article lists a few Etsy items, which is helpful, but does anyone recommend a consistent brand for long-term production? Looking for reliability
(not scared, just cautious lol).
If you want names: Degussa has been pretty consistent for me, especially the powdered color glazes.
Totally fair. For small-scale shops, consistency matters. Try buying a larger batch from one trusted seller and running a few weeks of tests before switching. Also, reading seller reviews and asking about batch consistency helps.
I stuck with the same 300ml medium-temp glaze for 2 years and it made production much smoother. Little variations still happen but predictability helps a lot.
Okay, full disclosure: I burned my first batch because I misread the firing schedule (duh). This article would’ve saved me a ton of anxiety. The Application and Firing tips are gold.
Question: anyone using the Japanese-Style Handmade Black Stoneware Espresso and Tea Cup as inspiration for shape and then using the 12-Piece Underglaze set for accents? Any tips on layering underglaze under a clear lead-free glaze?
Funny story: I once used too many underglaze layers and ended up with ‘mud painting’ effect — not in a good way 😂
Yep I do! Underglazes stick well under clear lead-free glazes. Important bit: make sure underglaze is totally dry and bisqued properly. Test for pinholes after glaze.
Good tips, Luke. Aisha — also avoid very thick underglaze layers; they can cause crawling. Do a small sample cup with the same clay body to verify results.
I appreciated the Materials, Ingredients, and Labels section the most. Quick tip for beginners: keep a spreadsheet of test tiles — date, recipe, firing schedule, and a small photo. Makes troubleshooting waaay easier.
Excellent suggestion, Sarah. That ties right into the Testing and Troubleshooting section — record-keeping is underrated.
Spreadsheet fanatic here too — color swatches + hex codes for underglazes saved my life when making sets for clients.
Super informative article. I appreciated the section on communicating safety to customers — short, clear statements helped my shop policy look professional. I now mention specific products like the ‘300ml Medium-Temperature Lead-Free Pottery Glaze’ in listings which customers love.
Do you link to the product pages or just name them? I worry about linking to third-party sellers causing confusion.
Awesome to hear, Claire. Transparency builds trust — listing the glaze and a short note on testing helps avoid questions at checkout.
I liked the troubleshooting flowchart idea in the article. Saved me from overreacting when my rims developed tiny pinholes — turned out to be application thickness, not the glaze formula.
Pro tip: clean your kiln shelves more often. 🙂
Cleaning shelves also prevents ash contamination. Learned that the hard way when a firing got speckled.
Yes! Pinholes are often application-related. And kiln maintenance is a huge factor in consistent results — good reminder.
Short and sweet: the recipes worked for me on stoneware at cone 6. No disasters, low odour, and my Turkish cup prototypes (similar to the Handmade Black Stoneware Espresso and Turkish Cup listing) look great.
Also: anyone else pronounce ‘glaze’ like ‘glayz’ in their head? lol
Did you use the 300ml glaze or mix from powder?
LOL yes! Also props for testing on those small cups first — saves clay and time.
Love that image — ‘glayz’ — made my morning. Glad the recipes translated well to your workflow, Ben.