
Why Local Clay Matters
We show how to find DEPENDABLE local clay, test its properties, and decide if it suits pottery or construction. This guide condenses fieldwork, lab shortcuts, and checkpoints so we can responsibly source nearby clay and plan a steady long-term supply.
What We Need
Finding and Sourcing Wild Clay for Pottery and Hand-Built Ceramics
Step 1: Research Local Geology and Permissions
Want clay in your backyard? Here’s how maps and records give us a head start — and why permissions save headaches.Start by researching local geology and land access before you drive anywhere. Check geological maps, soil surveys, and university or government mineral reports to flag clay-bearing formations within a reasonable radius. Use satellite imagery and topographic maps to spot depressions, old ponds, riverbanks, and road cuts where clay accumulates.
Contact landowners, municipal offices, or land managers to confirm ownership and permissions. Where collecting is restricted, pursue public lands or obtain permits. Record every contact and any restrictions on a simple field sheet.
Use a short checklist in the field sheet:
Ask local potters, builders, or historical societies for tips—former brickworks or clay pits can be unexpectedly productive. Prioritize fresh, undisturbed exposures and avoid recent fill or contaminated zones like adjacent to roads or industrial runoff. By the end of this step we typically have a short prioritized list of 4 to 8 potential spots worth visiting for sampling. We ask local potters and builders for quick tips about workability, common impurities, and seasonal moisture variations nearby.
Step 2: Field Sampling — Where and How to Dig
Dig smarter, not harder — how small targeted samples tell us more than blind scooping; simple tricks save time and soil.Follow a systematic sampling plan. Travel to prioritized GPS coordinates with our field sheet, tools, sample bags, and labels.
Record the exact location, exposure type, and which horizon we will sample. Dig small pits (30–50 cm) or use an auger to reach fresh exposures; remove weathered topsoil and take samples from consistent depths (for example, 10–20 cm into the fresh face) to compare like with like.
Collect multiple samples across a short transect (3–5 samples over 10–20 m) instead of relying on one grab sample. Label each bag with site, date, depth, and brief notes. Avoid cross-contamination by rinsing or using clean tools between sites and by taking separate samples from visibly different layers.
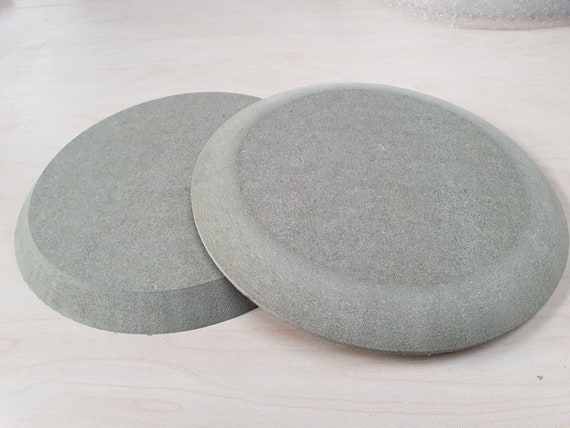
Document color, texture, visible inclusions (sand, mica, organic matter), and any smell. Take a larger bulk sample for ceramic testing and a separate subsample for on-site shrink–swell and plasticity checks. Photograph each sampling location and keep careful notes so we can reproduce findings and explain choices.
Step 3: Simple On-Site Tests and Observations
Quick chemistry and touch tests that tell us if the clay will behave — no lab degree required.Perform quick sensory checks first. Feel the wet sample for plasticity, note stickiness, and rub between fingers—if it polishes like talc it’s very fine; if gritty, it has sand.
Do a jar test: mix ~1 part soil with 2–3 parts water in a clear jar, shake, then let settle. Observe layers—sand settles in seconds, silt in minutes–hours, clay last—estimate proportions by layer thickness.
Apply a vinegar test: drop household vinegar on a tiny crumb. Watch for fizz—if present, carbonate is likely and can cause firing or strength issues.
Perform a ribbon test: roll a moist lump between thumb and fingers to form a ribbon. Note how long a 2–3 cm ribbon holds before crumbling—long hold = high plasticity, quick break = low plasticity.
Make a pan/cup drying test: shape a small disk or cup, measure diameter/thickness, let air-dry and observe cracking and dimensional change over a week.
Take small test bricks when practical to record color change when dry and fired, photograph textures and microstructure, and log every observation with the sample ID for later lab correlation.
Step 4: Laboratory Tests and Interpretation
When to pay for labs, what tests actually matter, and how we interpret numbers to predict firing and strength.Arrange laboratory testing for any samples that pass field screening so we can quantify properties and reduce guesswork.
Prioritize particle-size analysis (sieve + hydrometer) to get clay / silt / sand percentages and Atterberg limits (liquid & plastic limits) to assess plasticity.
Request mineral identification (XRD or simple ID) to spot organics, soluble salts, or problematic minerals.
Measure specific gravity and run Methylene Blue or CEC when budget allows to clarify clay mineral type.
Fire one small test to cone 06–10 to observe color, maturation, bloating, and shrinkage.
Interpret numeric results in context: high clay fraction with moderate plasticity suggests good forming clay but may need tempering; very high plasticity (high PI) warns of cracking and needs added coarse material; detectable salts or carbonates often disqualify samples for structural use.
Compare lab numbers with our field tests and user reports—e.g., 50% clay + PI 30 may form but needs grog; 70% clay + PI 50 likely requires major processing.
Log every value, field note, photos, and recommendation in a spreadsheet.
Discuss results with lab technicians and adjust sampling plans accordingly.
Step 5: Processing, Trials, and Long-Term Sourcing
Turn promising samples into usable material — small test batches first, then scale up with smart processing and quality checks.Run small-scale processing and firing trials; we wash, sieve, and settle or deflocculate samples to remove excess sand or organics, documenting mass losses and visible changes.
Prepare test pieces — tiles and small pots; dry slowly (hours to days depending on thickness), fire to the agreed test cone (e.g., cone 06–10) and observe color, strength, porosity, bloating, and maturation behavior.
Test mechanical properties with simple bend, thumb-pressure, and controlled drop tests; measure wet, leather-hard and fired dimensions to calculate shrinkage and note cracking or warpage so we can compensate in designs.
Develop a processing workflow when results look promising: stockpile, weather, blend batches, add temper or grog, and use simple on-site treatments like sun-drying or pugging.
Calculate yields and logistics: estimate raw clay per visit, access for hauling, seasonal limits, and transport costs so we know how much usable clay a site provides.
Maintain relationships and permissions with landowners; set sustainable extraction limits, avoid erosion, and rehab sites after digging.
Build a ranked local clay portfolio by quality, consistency, and cost; document every step, photograph samples, and save recipes for repeatability and improvement.
Conclusion: Build a Reliable Local Supply
By following these five steps we locate, test, and responsibly use local clay, minimizing surprises. Systematic sampling, simple field checks, targeted lab work and trials let us build a sustainable supply that supports our projects—are we ready to source locally?


Loved the emphasis on permissions and landowner respect — too many folks jump straight to digging. A few constructive thoughts:
– Add example wording for landowner permission (short script).
– Mention seasonal considerations: frozen ground vs muddy rainy seasons can make sampling hard.
– Maybe include a small section on transporting wet samples legally (hazard? regulations?)
Otherwise, very practical and encouraging — made me want to plan a weekend trip!
Thanks Priya — excellent suggestions. We’ll add a sample permission script and a brief note on seasonality and transport. Good call on transport: some regions have rules about moving soil, so always check local regs.
Seasonality tip is huge — clay sites can be inaccessible after heavy rains. I waited months for a dry window and it paid off.
Also consider biosecurity — rinse gear to avoid spreading invasive species between sites.
We’ll include links to county extension resources where available. Thanks for the detailed feedback!
On transport: in my state you can move small samples for testing, but commercial quantities need permits. Check with your county extension office.
Okay — I’m the kind of person who likes tiny details, so the diagrams and step photos were a BIG win. A couple of other thoughts:
– The color/texture photos in Step 3 were spot-on; I could tell immediately whether my sample looked promising.
– For labs, can you recommend a few that accept small personal samples? Not all do and it’s been frustrating.
Thanks for writing this — seriously useful resource. 😊
Thanks Ben — I’ll check GeoLab out. Admin — I’m in SE Michigan if that helps.
Thanks Emily — we’ll compile a short list of labs that accept hobbyist samples (region-based). If you tell us your area we can suggest options.
I use GeoLab (not sponsored) — they take small samples and their particle size report is easy to read.
Great practical guide — loved the field sampling tips in Step 2. I especially appreciated the map-reading and permission checklist. One question: when you say “dig at multiple depths,” how deep do you usually go for a first pass? I usually stop at about 30 cm but wonder if that’s too shallow for some deposits.
Good question — for a first pass we usually sample surface, 30 cm, and around 60–80 cm if feasible. That gives a quick sense of layering; deeper digs depend on permissions and safety.
30 cm is common, but in glaciated areas the clay can sit deeper. If you suspect a buried deposit, try a small test pit to 1m with permission.
I’ve had luck at 50 cm where a different color layer showed up. Safety first tho — bring a friend if you go deeper!
Short and sweet — loved the step-by-step format. The processing & trials section gave me the courage to try tweaking my body recipe.
What did you add to your body? Sand? Grog? I’m curious about your ratios.
Awesome — share your results if you do trials! Hearing what mixes worked for others helps the whole community.
Haha, step 1 had me googling geology maps for like an hour 😂. Wish I’d known about the quick online layers tip earlier. Also, pro-tip: bring sunscreen and snacks — digging is a workout. Also made a tiny typo in my notes and spent 20 mins looking for site 7 instead of 17 😅
Adding a ‘Field Kit’ sidebar with essentials (sunscreen, wipes, snacks, camera, sample bags) in the next update. Thanks for the idea!
Snack rec: protein bars and salted peanuts. Keeps you digging longer!
Also: bring baby wipes. Mud+hands=not great.
Glad the online layers tip helped! Sunscreen + snacks = fieldwork essentials. We’ve all been there with typos — brutal but funny in hindsight.
This was super helpful — clear steps, good flow from geology to trials. A few things I tried after reading:
1) Used the on-site ribbon test from Step 3 — way faster than hauling samples back and forth.
2) Contacted a local farmer for permission — they were surprisingly chill about me taking a few buckets.
3) Did a tiny firing trial in my backyard kiln and learned my clay needed more sand.
Only tiny nitpick: wish there was a short checklist printable for permissions and lab labels. Could you add a PDF?
If you need a quick label template, I can share the one I made in Google Docs — PM me 🙂
Added: we’ll include a sample photo checklist and permission wording in the next revision. Thanks for the suggestion!
Agree about the checklist. Also remember to photograph the site with a scale — saves you tons of guesswork later.
Thanks, Sara — glad it helped! We’re working on a printable checklist and label template — should be up soon. Great idea to test a tiny firing first.
Nice write-up but felt a bit light on lab methods. ‘Do tests’ is a little vague — what EXACTLY should a hobbyist expect from a commercial lab vs a university lab? Pricing ranges would be helpful. Otherwise, solid.
Fair point. Commercial labs usually offer particle size, Atterberg limits, and organic content for a fee; university labs may do the same but can be cheaper or offer student-rate testing. We’ll add a pricing/what-to-expect section.
I used a state university lab once — cheap but slow (6–8 weeks). Commercial lab was faster (1–2 weeks) but pricier. Worth shopping around.
I wanted more on long-term sourcing (Step 5). How do you approach building relationships with landowners for a steady supply? Do you do share agreements or small payments? Also curious about storage tips for large volumes of raw clay.
Thanks — a sample agreement would be super useful. I worry about liability too, so glad you mentioned written terms.
Great question. We usually start with goodwill — small payments or exchanged services (help on the property, pottery pieces). For steady supply, a simple written agreement helps (we’ll add a sample). For storage: keep it covered, slightly damp in sealed bins, and away from freeze-thaw if possible.
Useful, but felt a bit hobbyist-focused. If someone wanted to scale to a small studio supply (sell clay), there should be more on regulations, transport, and bulk processing. Also more specifics on aging/conditioning clay would be nice.
Valid point. The guide is aimed at hobbyists and small studios, but we can add an appendix for scaling: basic permits, bulk-processing tips, and conditioning/aging methods.
Agree — I ran into zoning and sales rules that surprised me. An expanded section on that would help a lot.
We’ll work on a ‘Scaling up’ addendum that covers local regulations, simple processing equipment, and QA checks. Thanks for pushing us to improve it.
Thank you for this — clear and approachable. Quick ask: any recommended books or online courses for learning clay mineralogy without a geology degree? I’m not ready to interpret XRD reports yet 😅
You’re welcome! We’ll list a few beginner-friendly resources (intro to clay mineralogy, soil science primers, and some YouTube channels). Short answer: start with ‘The Nature and Properties of Soils’ for basics, then look for pottery-specific mineralogy primers.
Try community college geology classes too — they’re inexpensive and hands-on. Saved me a ton of confusion.