
Why Contemporary Ceramic Experiments Matter
We take a playful, laboratory-minded approach to ceramics, testing glazes, tweaking processes, and creating surprising work. This guide gives six clear steps so we can experiment confidently, learn quickly, and iterate toward reliable, striking results with joy and thoughtful curiosity.
What We’ll Need
We’ll need:
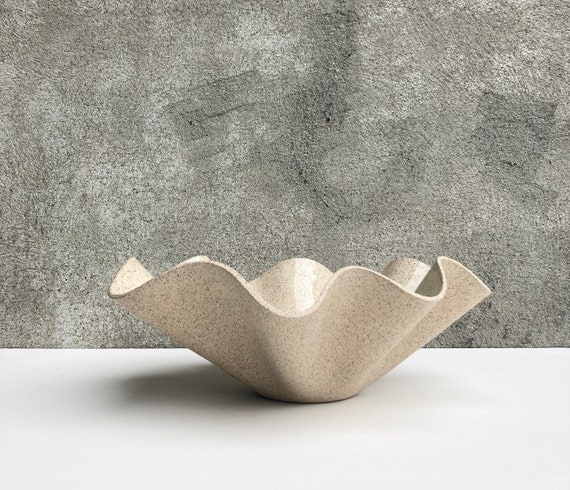
Testing Mug 71/100: Handcrafted Pottery and Ceramic Art
Frame the Experiment: Hypothesis, Goals, and Constraints
Curious what one small tweak could do? Let’s decide what we’re testing and why — with bold boundaries to stay focused.Define a clear hypothesis and measurable goals: are we testing color response, surface texture, glaze fit, or firing atmosphere? Decide what success will look like before we mix a batch.
List constraints such as:
Outline success criteria and plan the minimum viable test matrix so our trials stay purposeful. For example: require <5% color variation, no crazing, and consistent gloss. Plan to vary one factor at a time, include a control, and run 2–3 replicates per condition to spot consistent trends.
Select Materials: Clay, Glaze Recipes, and Test Specimens
Which clay truly plays nice with that wild glaze? Spoiler: compatibility beats novelty every time.Choose clay bodies that match our hypothesis — porcelain for translucency, groggy stoneware for texture, or earthenware for low-fire color tests. Formulate glaze recipes with clear targets (matte vs. glossy, opacifier levels, colorant percentages).
Prepare representative test specimens and standardized tiles to compare responses across surfaces:
Prepare test batches consistently. Document batch sizes, raw materials, weighing methods, and mixing times. We choose clay bodies and formulate glaze recipes that align with our hypothesis. We prepare standardized test tiles and representative forms (slabs, rims, or small vessels) to reveal responses across surfaces. We document batch sizes, raw materials, and mixing methods so every variable is traceable and repeatable in later rounds.
Design the Test Matrix: Variables, Controls, and Replication
How many knobs can we turn before results get meaningless? Let’s design smart tests with surprising statistical sense.Vary one primary variable at a time and hold everything else constant so we can trace cause and effect. For example, test cobalt at 0.5%, 1%, and 2% on identical tiles while keeping the same glaze base and thickness; include an unaltered control tile.
Decide replication to absorb kiln variability: use 3–5 replicates per condition, place samples across shelf positions, and randomize placement when possible. We document batch numbers and sample IDs.
Map firing schedules explicitly: record ramp rates, target temperature, soak times (e.g., 10–30 minutes), and any atmosphere changes (oxidation vs reduction). Log cone equivalents and thermocouple traces so each run is reproducible.
Execute with Care: Preparation, Application, and Firing
This is where intentions meet messy reality — but careful technique makes all the difference.Prepare surfaces; we sand, clean with alcohol, and ensure bisque porosity matches our chosen application method.
Apply glazes consistently; we dip for even coverage, brush for edges and details, and spray for thin, controllable layers (example: dip base, spray accent glaze).
Label each specimen meticulously; we use underglaze pencil, numbered tags, and a master log to cross-reference recipe, thickness, and shelf position.
Load the kiln strategically; we separate reactive glazes, use catchers under runny tests, and distribute replicates across shelves to reduce position bias.
Follow the planned firing schedule; we record ramp rates, cones, and soak times and keep thermocouple traces.
Monitor critical points and note anomalies — thermal shock, blistering, or unexpected runs — as important data, not failures.
Observe and Record: Analysis, Testing, and Documentation
Don’t guess — measure. Our observations become the roadmap for meaningful tweaks.Inspect cooled pieces under consistent, neutral lighting. Note color, texture, gloss, fit, and defects. Photograph with a gray card and shoot close-ups of faults — for example, capture crazing at a 45° angle and include a ruler for scale.
Perform functional tests:
Log application method, glaze thickness, shelf position, firing curve, and photo filenames in our lab notebook or spreadsheet. Compile results into tables that map variables to outcomes and flag surprising interactions (e.g., thicker application produced speckling). Use these notes to plan the next iteration.
Tweak, Repeat, and Scale: From Successful Tests to Finished Work
One test rarely finishes a project — how do we scale good outcomes without losing their character?Synthesize our findings to refine recipes and firing curves. Prioritize changes that produced meaningful improvement — for example, reduce a reactive flux by 10% if thinner application produced cleaner blooms, or add a 15°C soak to stabilize crystal growth on a 12″ serving bowl.
Re-test key variants under tighter controls: same bisque, identical glaze thickness, fixed shelf position, and at least three replicates. Scale successful combinations to full-size pieces, adjusting application technique (spray vs. brush) and kiln loading (stagger pieces, keep vents clear).
Create a reproducibility checklist and include:
We also create a reproducibility checklist so our best results can be replicated reliably by our future selves.
Iterate, Learn, and Share
We close by documenting successes, surprises, and patterns, sharing findings with peers, and refining methods through repeated tests—turning curiosity into reliable, expressive ceramics. How will our next experiments reshape our techniques, surfaces, and stories, and expand our creative language together?


Nice concise guide — loved the emphasis on a test matrix. Quick question though: I often get glaze crazing when I switch to a different clay body. The guide mentions matching expansion but any practical tips? I tried slow cooling once and it helped a bit.
Also, has anyone tried using a thin paper template to mark test spots before firing? Saves so much time.
I use a small expansion test: make two small tiles of clay and glaze one, leave one unglazed, then do a bend/feel test after firing. Not scientific but saved me from several busted batches. Paper templates = 👌
Great observation, Liam. Crazing usually points to a mismatch between clay and glaze thermal expansion. Try a glaze recipe with slightly lower expansion or test a thin rutile/silica adjustment. Slow cooling can help but it’s not a cure-all. Make small, systematic changes and note them in your records (section 5).
The test matrix examples were the most practical part for me. I’ve been doing ad-hoc tests forever and this finally made me actually replicate stuff properly. Thanks!
One tiny nit: show a sample spreadsheet download in step 3 next time.
If you want a quick hack: use the first row of your phone notes to paste the column headers and then copy/paste into Sheets after a session. Works offline too.
Good idea, Oliver — a downloadable template is on our todo list. For now, check the replies above for simple column suggestions (clay, glaze, % change, test ID, firing profile, photos).
Also, if anyone wants, I can post a basic test-matrix CSV in the comments next week — lmk what fields you’d like included.
Second this. A simple CSV template would save so much time for people just starting with systematic tests.
Really dug the structure of this — the 6 steps make sense for a newbie like me.
A few random thoughts/questions:
1) For section 1: how strict should a hypothesis be? I tend to write long, vague goals and then get lost.
2) Section 3’s matrix idea is gold, but how many variables is too many for one experiment?
3) Any recs for digital tools to record outcomes? I’m tired of sticky notes.
Thanks for compiling this. It feels like a safe permission slip to experiment, instead of ‘make perfect pieces only’.
Maya — love the enthusiasm. Short answers: 1) Keep hypotheses specific and testable (e.g., “Increase tin in glaze X by 2% reduces crazing”). 2) Limit to 2–3 variables per run if you want clear interpretation. 3) For digital: simple spreadsheets work great; there are also ceramics-specific apps and note apps like Notion or Evernote for photos and kiln logs.
I use Google Sheets with columns for clay, glaze, thickness, firing schedule, and photos. Took a while to set up but now it’s saved me from repeating dumb mistakes.
Hypotheses = tiny and nerdy. I write mine like a tweet. Makes it easier to test. For variables, try one factor at a time unless you know factorial designs — otherwise you’ll drown.
Solid walkthrough. Any chance you can share a simple downloadable test-matrix or template? I’m terrible at starting from scratch.
Yes—planning to post a basic CSV/Sheets template soon. Meanwhile, include columns for: Test ID, Date, Clay Body, Thickness, Glaze Name/Recipe, % Change, Application Method, Firing Schedule, Photos (links), Notes, and Outcome.
That column list is perfect. Copy-paste into Sheets and you’re good to go. You can add humidity and kiln load as extras if you want.
Loved the ‘Execute with Care’ section. So many people rush to the kiln like it’s a vending machine 😂.
Constructive: I felt the guide skimmed over safety a bit — like respirators during dry mixing, ventilation for stains, and safe handling of soluble materials. Maybe add a quick checklist?
Otherwise, the ‘tweak, repeat’ mindset is fantastic. Made me less scared to mess things up.
You’re right, Zoe. Safety is crucial — we’ll add a compact safety checklist (PPE, ventilation, safe disposal, kiln placement). Thanks for flagging that.
Ventilation is huge. My studio gets crazy dusty if I skip the extractor during mixing. Respirator saved my sinuses.
Adding: respirator rating (P2/P100), eye protection during mixing, gloves for acids, and kiln clearance distances. We’ll weave it into step 4.
Agreed. Also: always label test tiles with a graphite pencil before firing. I once lost a week’s worth of tests because I smudged the ink. Facepalm.
Also: recycle your test shards into grog — less waste, and better body control in future batches.
This guide reminded me why I love the maker space community — everyone shares tiny hacks that matter.
Long ramble incoming:
I ran a community workshop where we followed these 6 steps with a group of newbies. We split into teams, each framed a hypothesis (step 1), picked different slips and glazes (step 2), and designed a tiny matrix (step 3). We learned more in one afternoon than a month of trial-and-error solo. The ‘observe and record’ step forced people to look closely instead of guessing.
If you’re teaching this, add pair activities and a shared whiteboard for live notes. Makes the iterate/learn/share loop so much faster.
PS: also — snacks. Always snacks at workshops.
Haha, ‘moody blue’ vs ‘just grey’ — brilliant. We’ll include a note about standardized color references like Munsell chips for clearer communication.
Community feedback loop = fastest way to learn IMO. Plus, more opinions on whether that glaze is ‘moody blue’ or ‘just grey’ 😂
Love the team idea. When I ran a class, having color cards to compare glazes helped people communicate results better.
Amazing! Thanks for sharing that workshop story, Priya. We’ll add a mini-section about teaching/working in groups and recommended activities like paired hypothesis framing and communal result boards.
Snacks are non-negotiable. Also: encourage participants to bring a phone tripod for consistent photos — tiny detail but so helpful.
Hypothesis first? lol, I usually start by throwing something and then make up a hypothesis to justify it 😂.
But seriously, I tried framing tests properly after reading step 1 and it actually made the outcomes easier to interpret. Also, no idea why I didn’t think to log clay batch numbers earlier — game changer.
Same, I call it ‘post-hoc hypothesis’ and it works for exploratory experiments. Just be clear when you’re exploring vs testing a prediction.
Good point from Maya — classify sessions as ‘exploratory’ or ‘confirmatory’ in your notes. It’ll save you headaches later.
That’s a very human approach, Noah — art first, hypothesis later. The guide isn’t trying to kill spontaneity, just to make repeatability easier when you need it.
Logging clay batch numbers is huge. I once had a whole line of work go off because a supplier changed the grog content.
Replication is underrated. The guide nailed that: do at least three of each test if you can. I started documenting humidity and clay age too — tiny variables that sneak in.
Question: any opinions on photographing tests before and after glazing vs only after firing? I like both, but file sizes add up fast.
I take phone photos and then zip them monthly into dated folders. Saves space and keeps the timeline tidy.
Photograph at every stage if possible — raw, glazed (wet), and post-fire. It helps spot application issues vs firing issues. Use lower-res thumbnails for quick reference and keep one high-res for the best examples.
Also tag photos with filenames like ‘Clay_Glaze_Temp_ID’ so you don’t have to dig through metadata later.
Kiln schedules: okay, I’m obsessed. The guide’s firing section was helpful but I have a couple long questions so here’s the tl;dr version:
– Ramp vs soak: when do you actually need a soak? I usually do short soaks at cone 6 for celadon but is that overkill?
– Cooling: are there times when fast cooling is better? I heard some surfaces need quenching to get certain crystals.
– Any rules of thumb for scaling from a single test tile to a whole run (in terms of schedule)?
Would love a follow-up post on this. Or a forum thread.
Good questions. Short answers: soaks help mature certain glazes and burn out carbonates; use when the glaze benefits from flux diffusion. Fast cooling can promote some crystalline effects but risks thermal shock — do small tests first. For scaling: keep the same deltas in ramp/soak; larger loads may need slower ramps to avoid uneven temperatures.
For celadon, my go-to is a 10–20 min soak near peak to deepen color. But test tiles first — kiln atmosphere and load matter a lot.